
I’ve admired Johannes Vermeer’s (1632-75) paintings for some time. While I was searching the web for more information, I came across a book titled Vermieer’s Camera, Uncovering the Truth Behind the Masterpieces, by Philip Steadman, Oxford University Press, 2001. This book contains a comprehensive, detailed and well-illustrated source of information on how Vermieer may have used the camera obscura to produce the many of his approximately thirty-six known works. I had to build one!
This excellent resource was the catalyst for building two functional camera obscura. Mixing old ideas with modern, inexpensive materials, and adding a digital camera and computer to document the process was a very satisfying project. I hope you enjoy reading about this effort.

Photo 1. This is the first model of a camera obscura I built to work out some construction problems. The overall measurements are 6 ½ X 6 ½ X 14 inches.
I used a cheap plastic magnifying glass for the lens and placed this at the end of a cardboard tube. White foam core was used for the body of the camera. A 4″ X 6″ mirror was set at a forty-five degree angled wedge, and attached to the inside end of the outer box at the back of the camera. This reflected the image from the lens to a glass plate on the top of the outer box.
I painted the inside of the two boxes black, then covered all outside edges with black construction paper. A hot glue gun was used for the box construction, and Elmer’s white glue for the trim. I put a telescope diagonally above the lens tube, but it was useless. Tracing paper was laid on the glass, and the image was traced onto the tracing paper.
Focus is achieved by sliding the front box back and forth. As expected, the image projected onto the tracing paper was less than good. I needed a bigger box and lens.
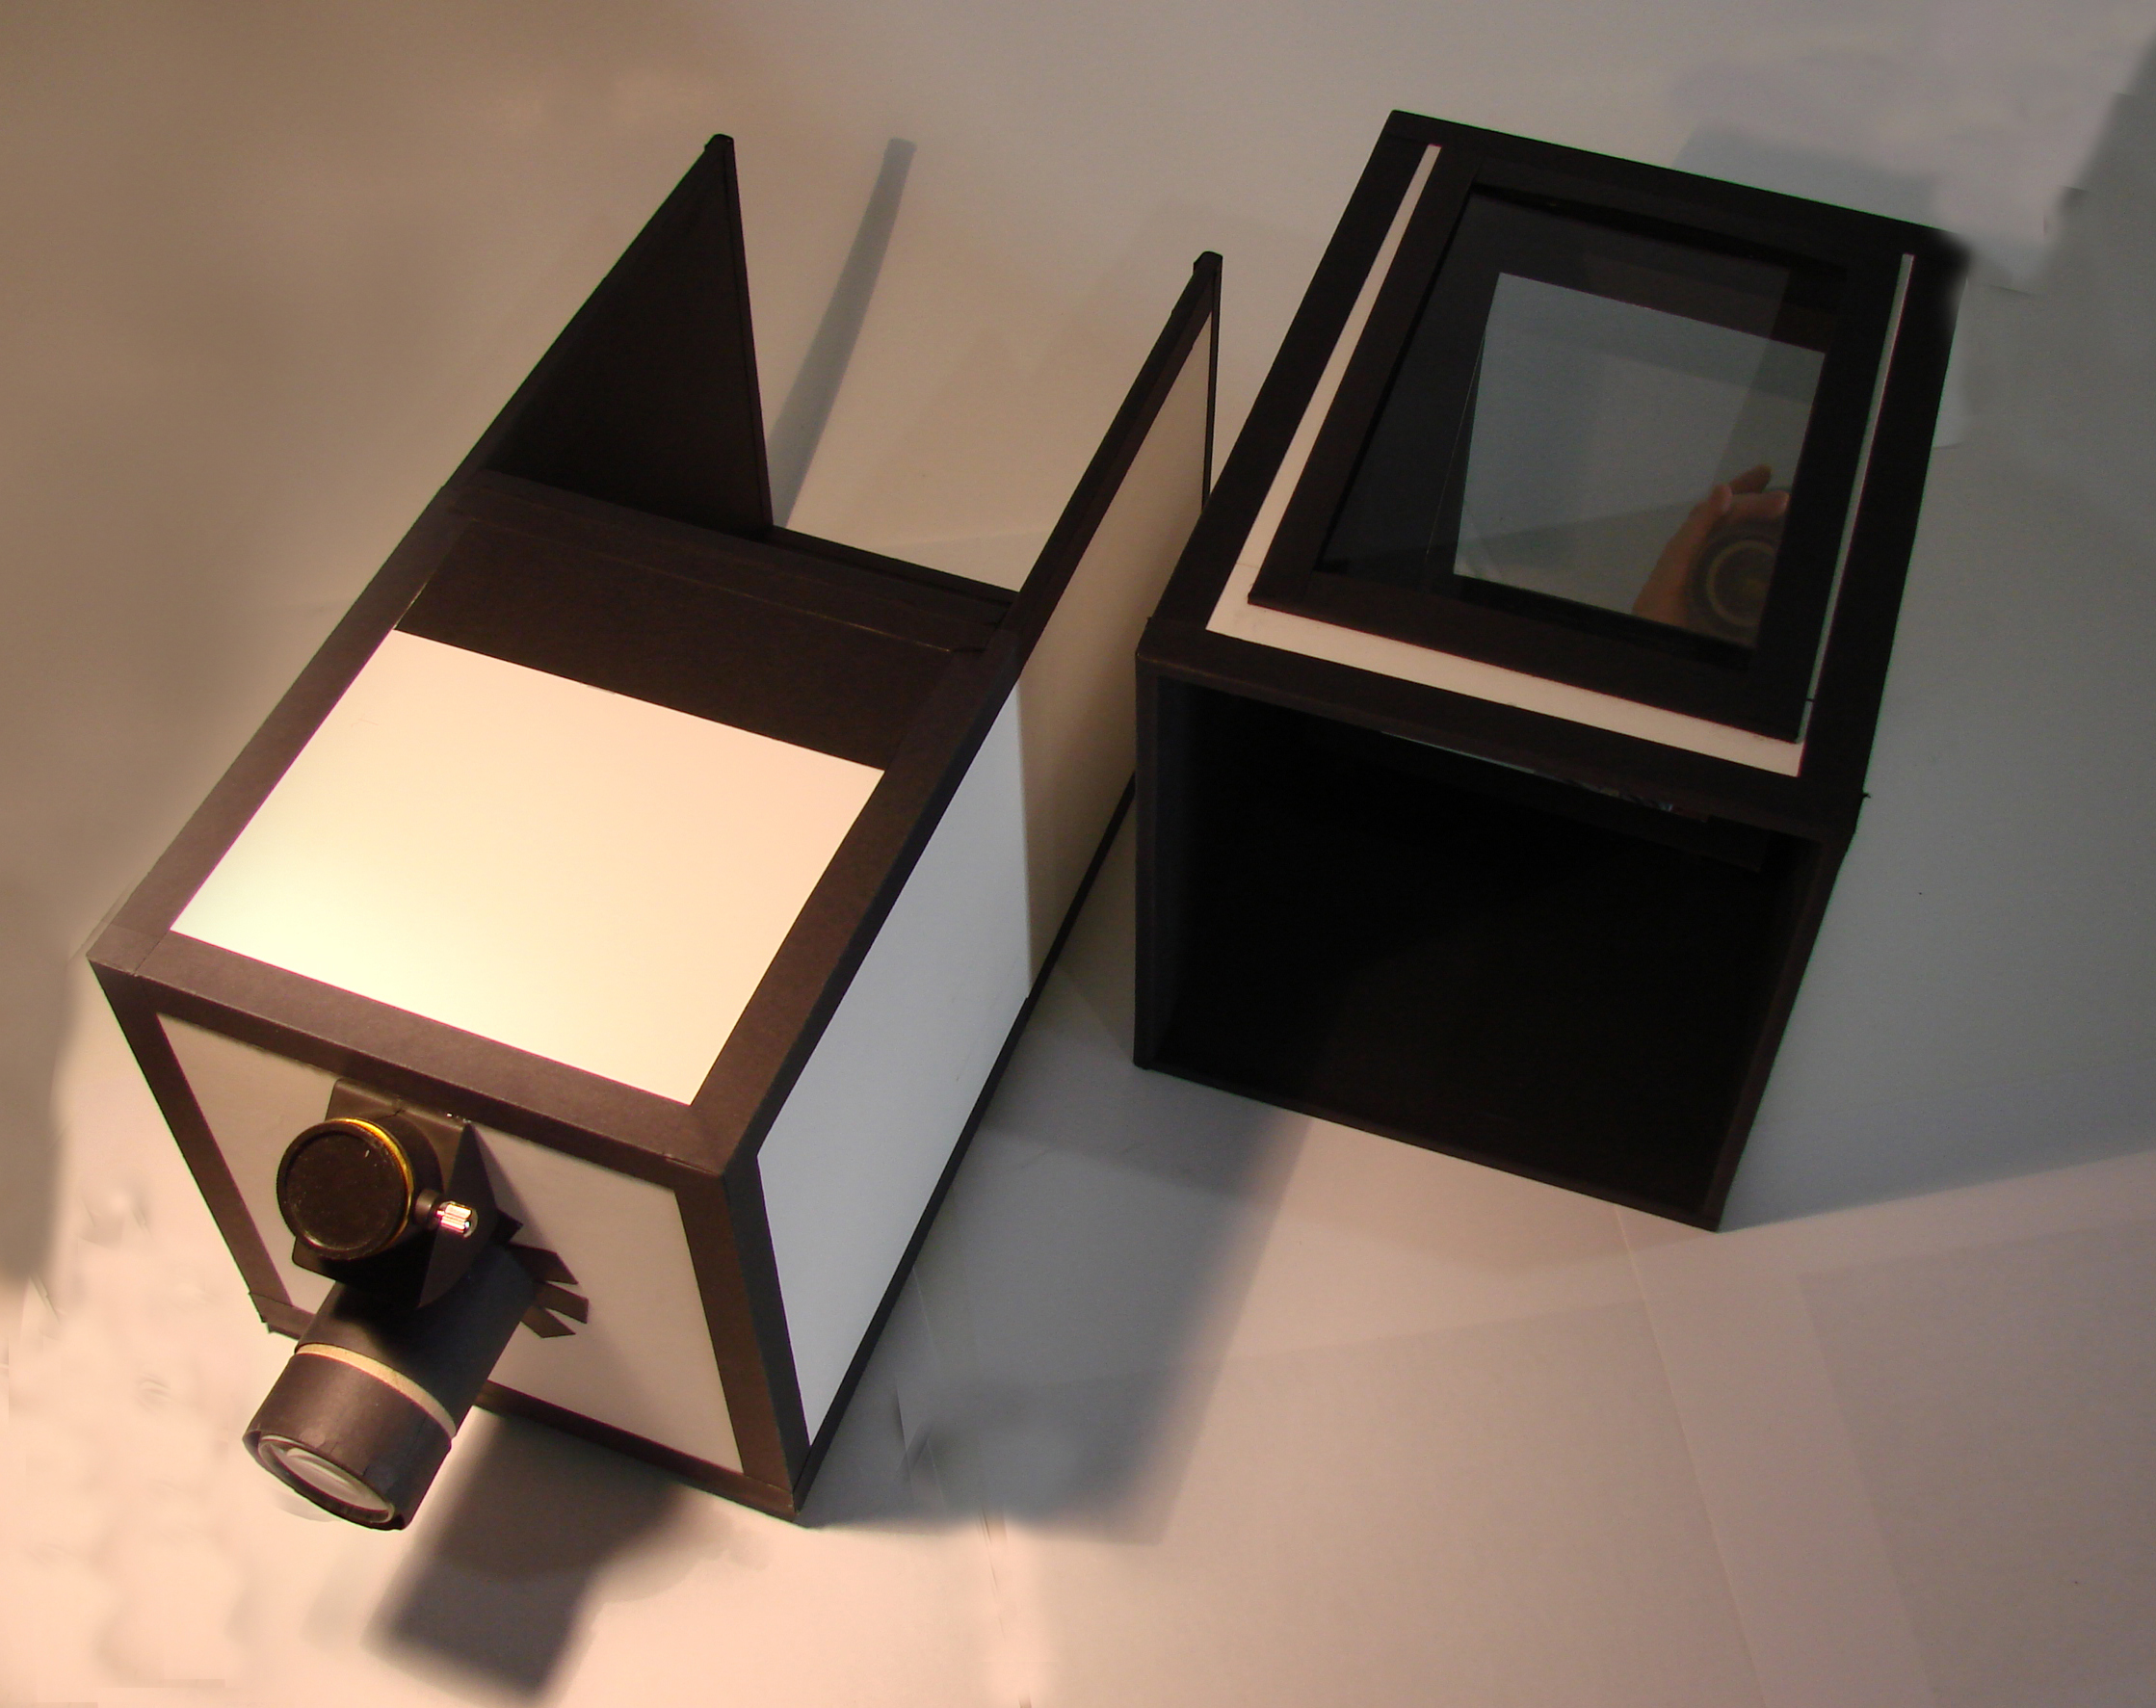
Photo 2. This shows the construction detail and how the inner box is fitted into the outer box of the first camera obscura. The 4 ½ X 6 ½ inch glass plate has tabs that hold the tracing paper in place. The image is projected onto the paper, and can be traced onto the paper.
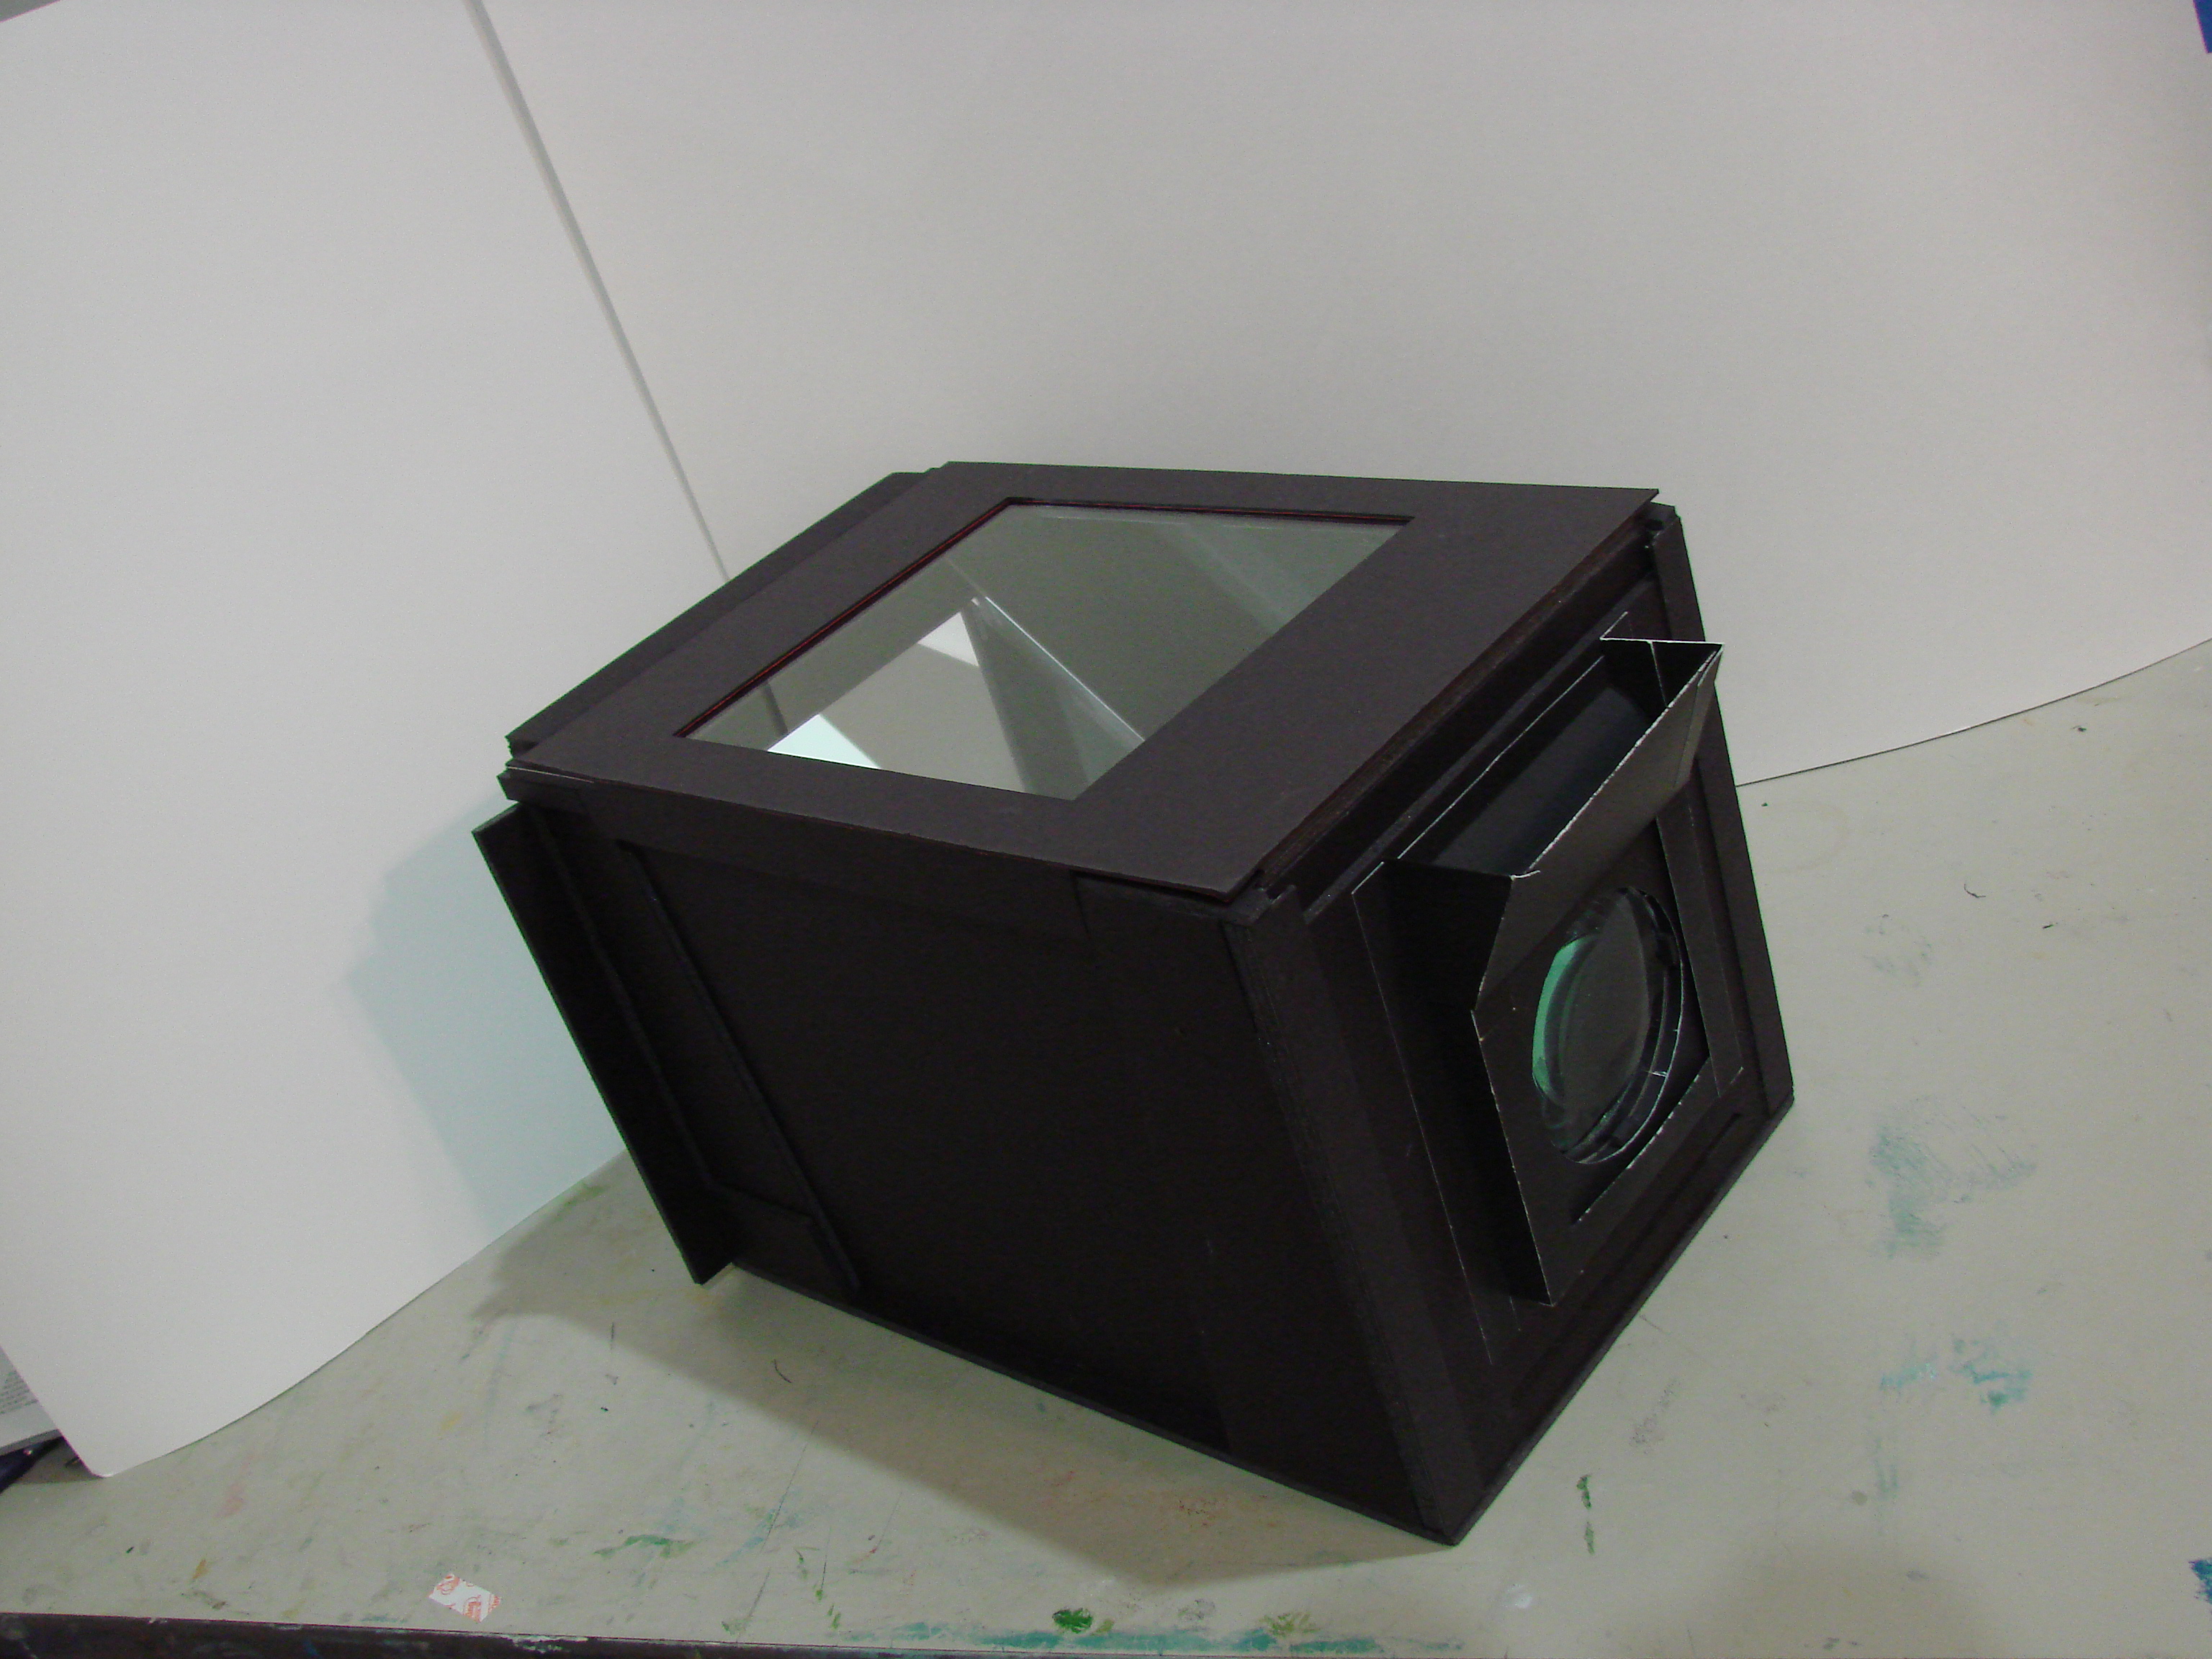
Photo 3. The second camera obscura worked out much better. This camera measures 10 X 10 X 16 inches.
I started with black foam core, black card stock, Elmer’s glue, and a hot glue gun again. I used an old, glass three-inch diameter magnifying glass for the lens. I constructed the lens cell first, as this dictated the overall size of the body of the camera. The lens cell can be positioned in three vertical slots to help reach focus on the glass plate.
I included a slot directly in front of the lens (the angled piece above the lens) so I could insert one of three pieces of card stock with different-sized holes cut into the centers. These can be slid in front of the lens and act as F-stops, controlling the amount of light coming through the lens.

Photo 4. The lens cell began with an 8 X 8 inch square of foam core. I cut out a 2 7/8 inch hole in the center of this, and laid the lens over this. Thin, black cardstock strips were glued, on edge, around the lens to build up the rim around the mirror.
Narrow pieces of cardstock were added inside these to hold the mirror in place against the 8 inch square. Four 5/8 square pieces of card stock were placed around this.
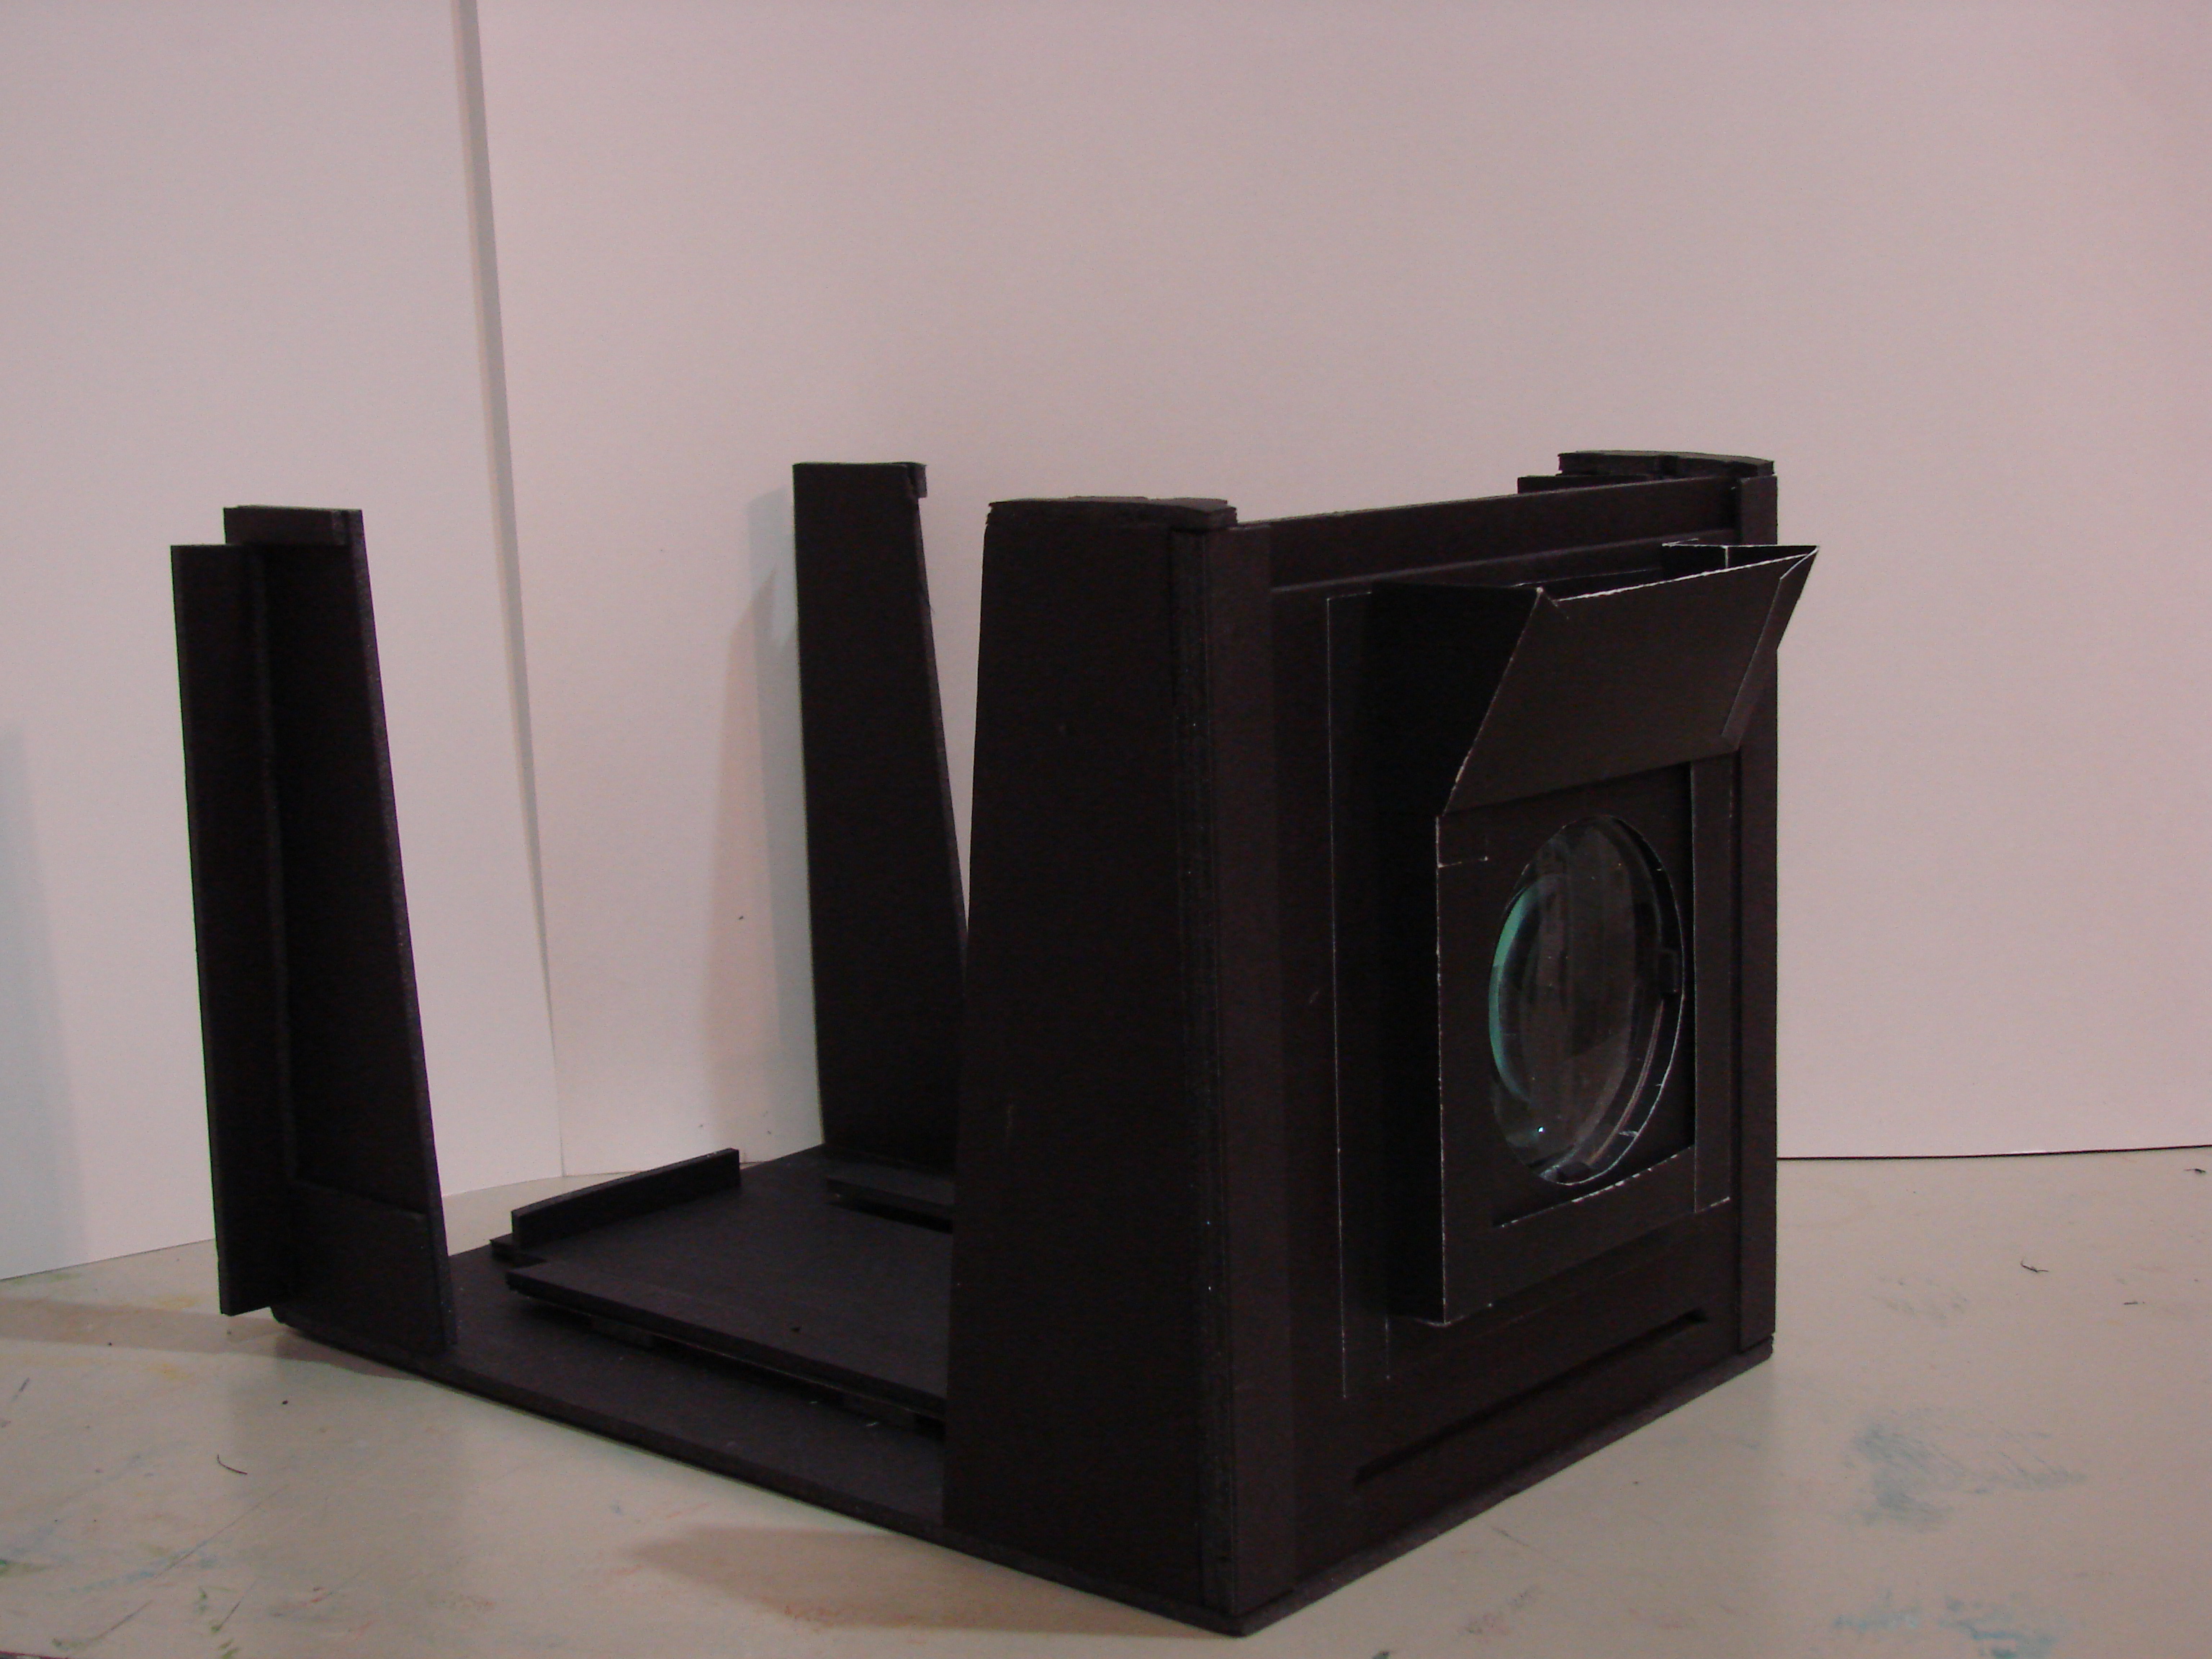
Photo 5. I cut a base of foam core 9 X 14 inches and built corner supports to hold the lens cell and back corners of the camera body. A second 8 X 8 inch piece with a 2 7/8 inch hole was placed between the front posts. The lens cell is slid into the slots and lines up with the hole in this piece. Bracing and corner supports were added as needed.

Photo 6. I mounted a 6 X 8 inch mirror on a pair of 45 degree angle wedges. This was glued to movable sled that slid back and forth on a track in the base. This is how I would obtain focus on the tracing paper which would be positioned on the 7 X 9 inch glass plate (not shown yet).
This sled can be lifted out at the extreme end of the track and a vertical frame can be inserted in place of the mirror. This sled would obtain focus on the tracing paper mounted on the vertical frame. Light coming through the lens is inverted and projected on the tracing paper upside down. Focus is obtained in this model by a combination of lens position and distance of the sled from the lens.
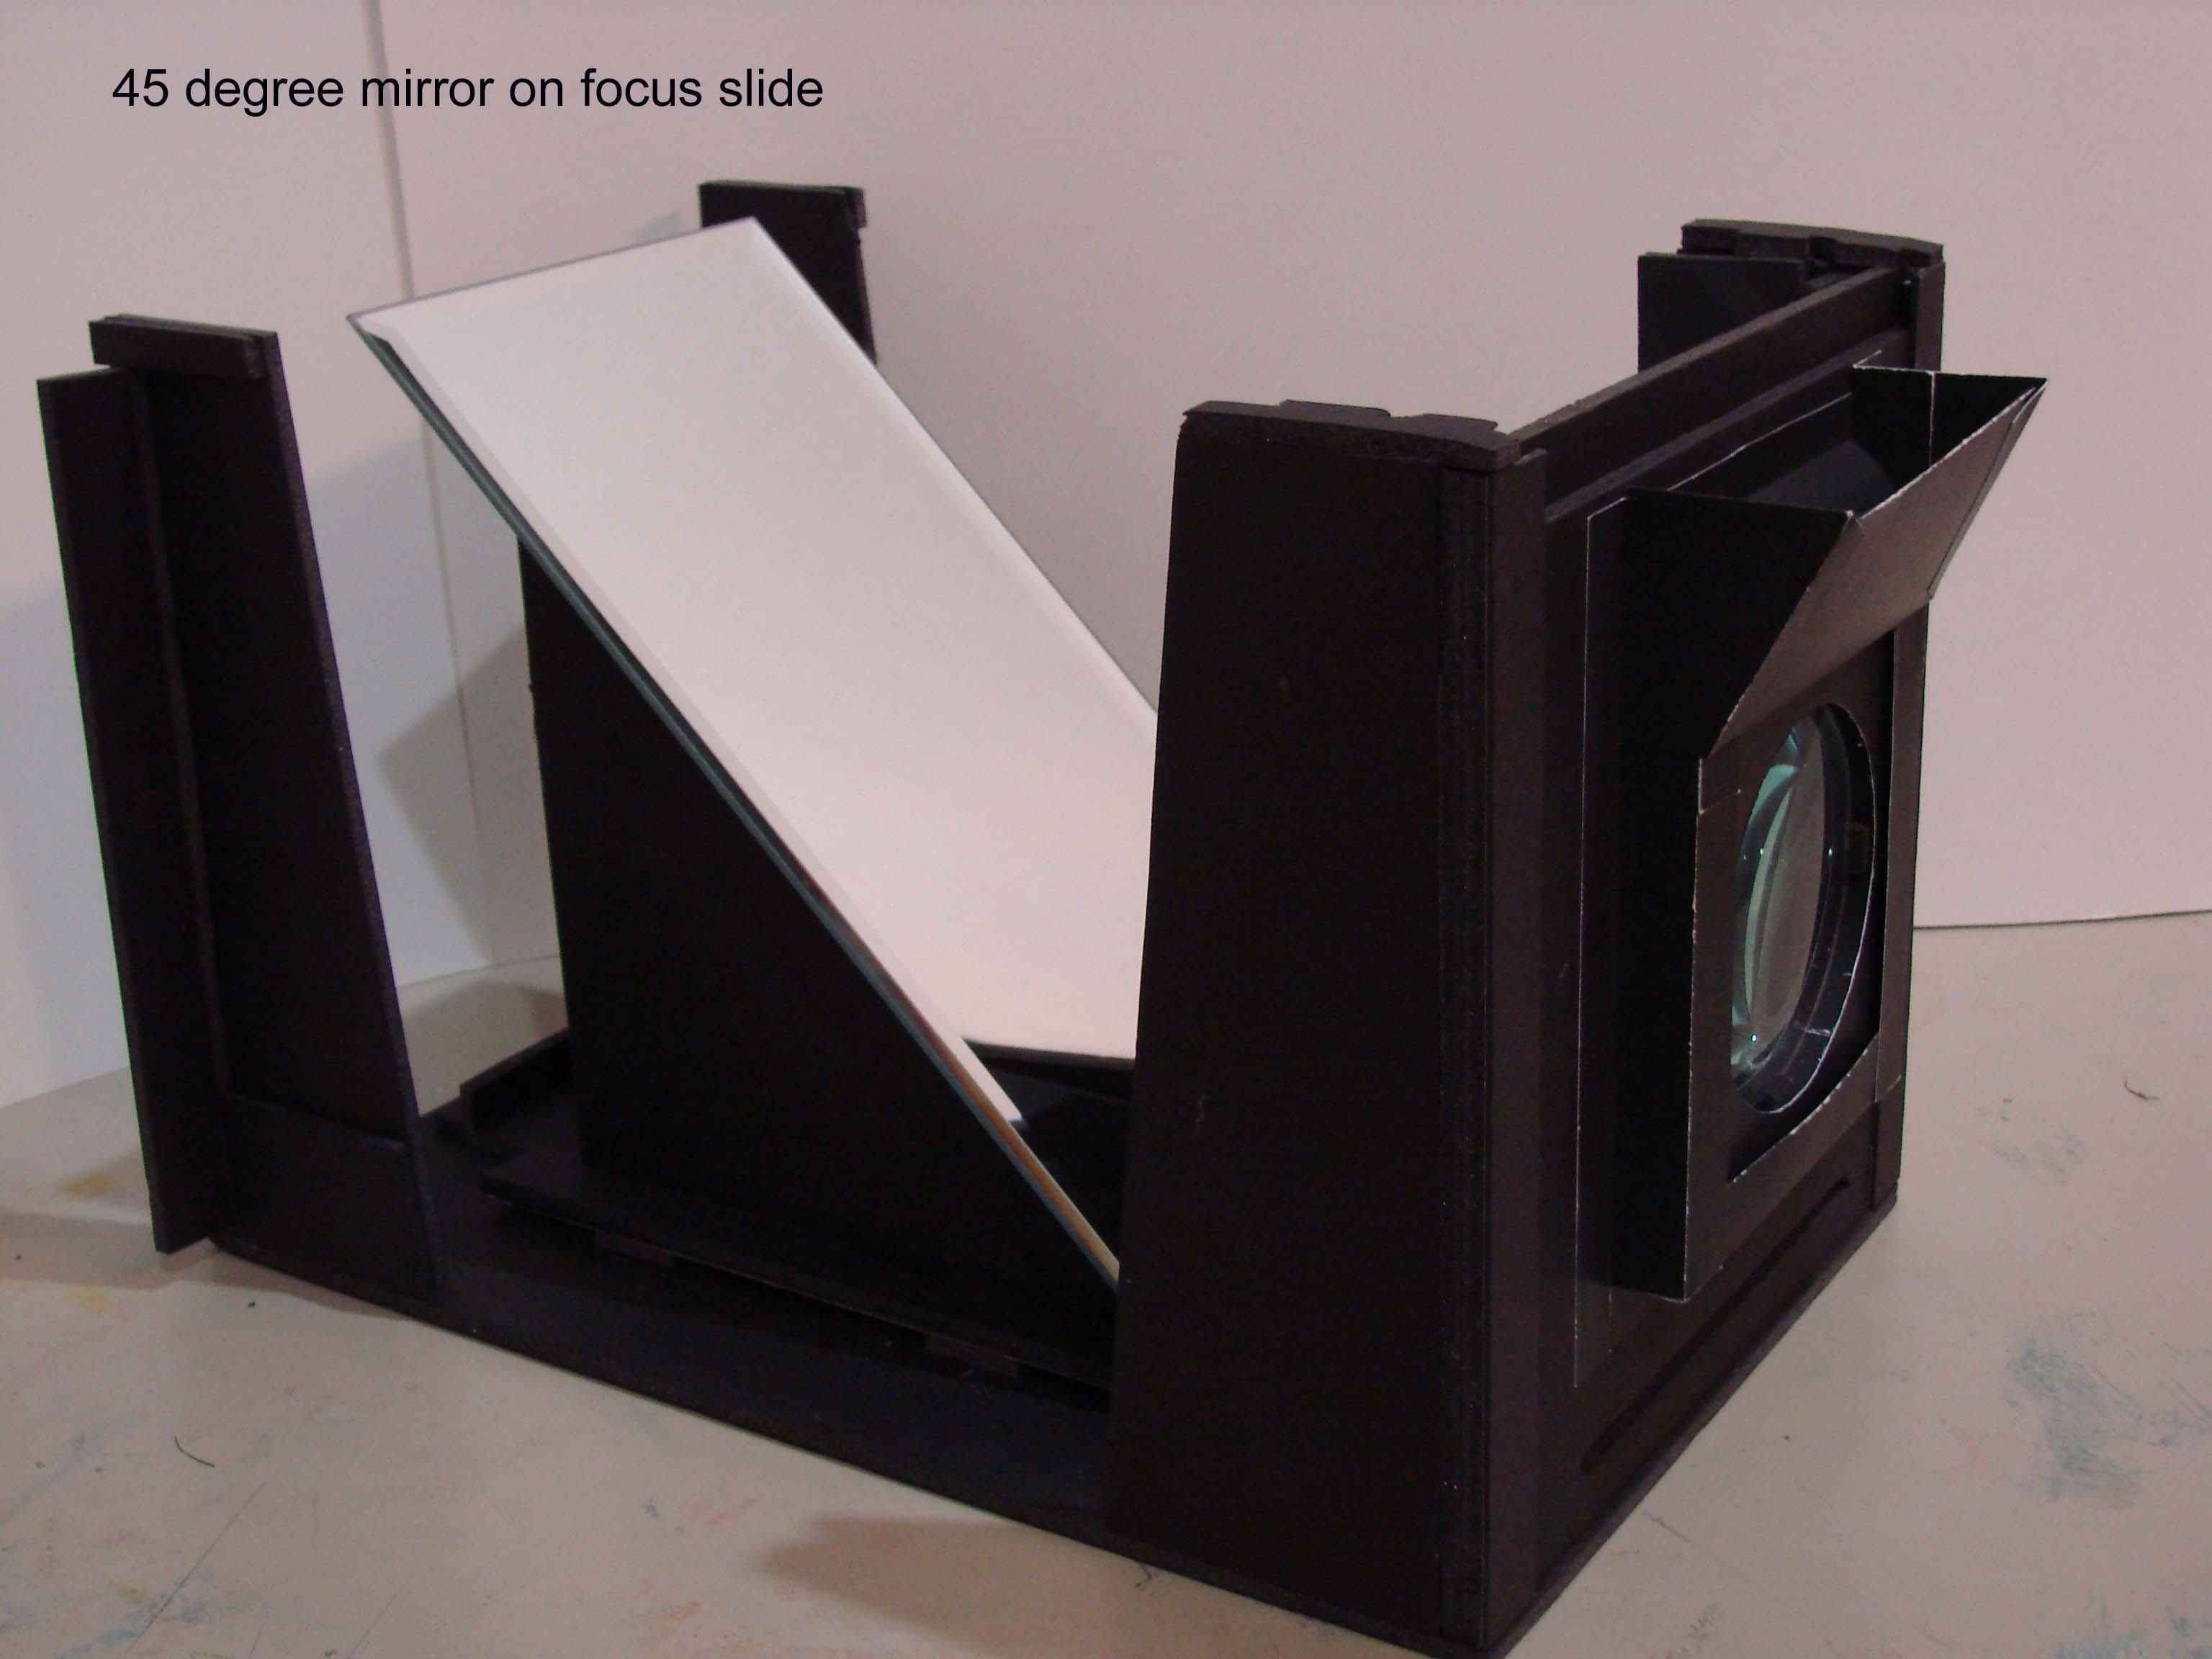
Photo 7. Front quarter view of the mirror sled, with the lens cell and F-stop slot in place. I added the angled pieces at the four corners to hold the lens cell, and the back-end of the camera box to strengthen the corners.
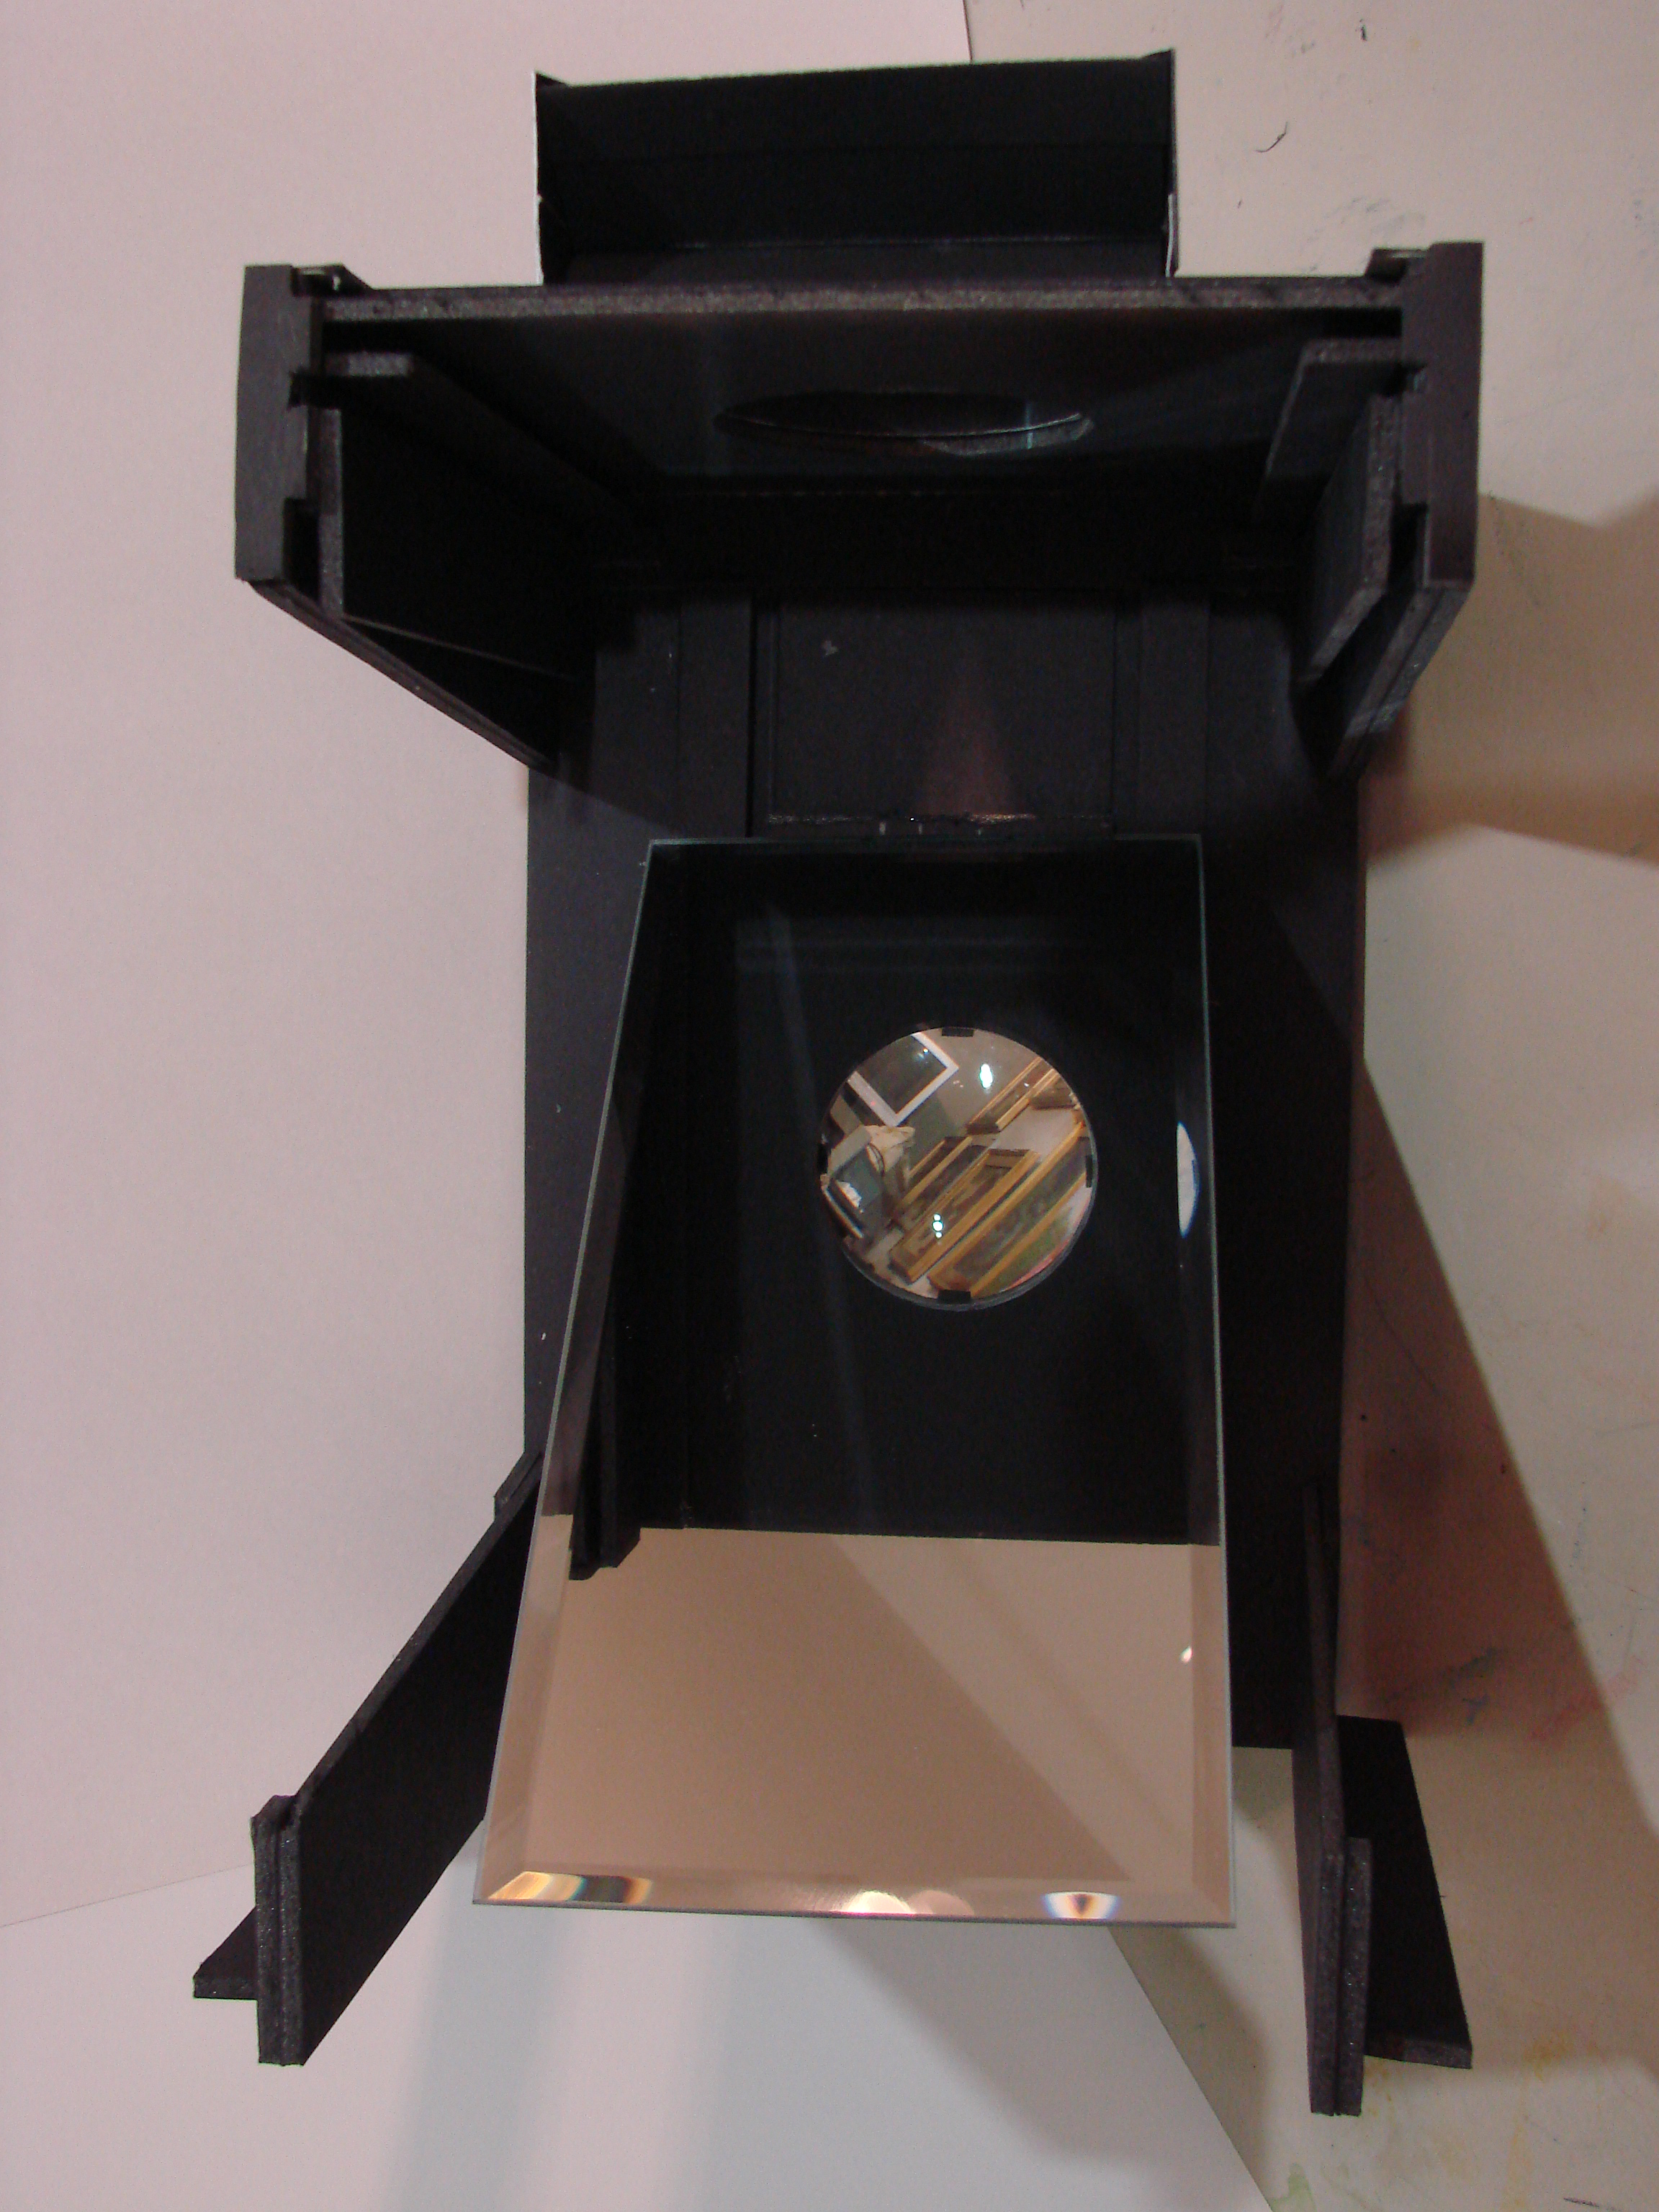
Photo 8. This top view shows the front of the camera obscura, with three slots for positioning the lens cell, the mirror on the sled, and the rear supports of the camera body. In this photo you can see the corner wall of my studio. This will be projected onto the tracing paper set on the top glass.

Photo 9. This is the vertical sled in position with the tracing paper in place. This paper will have an inverted image when viewed through the open back of the camera.
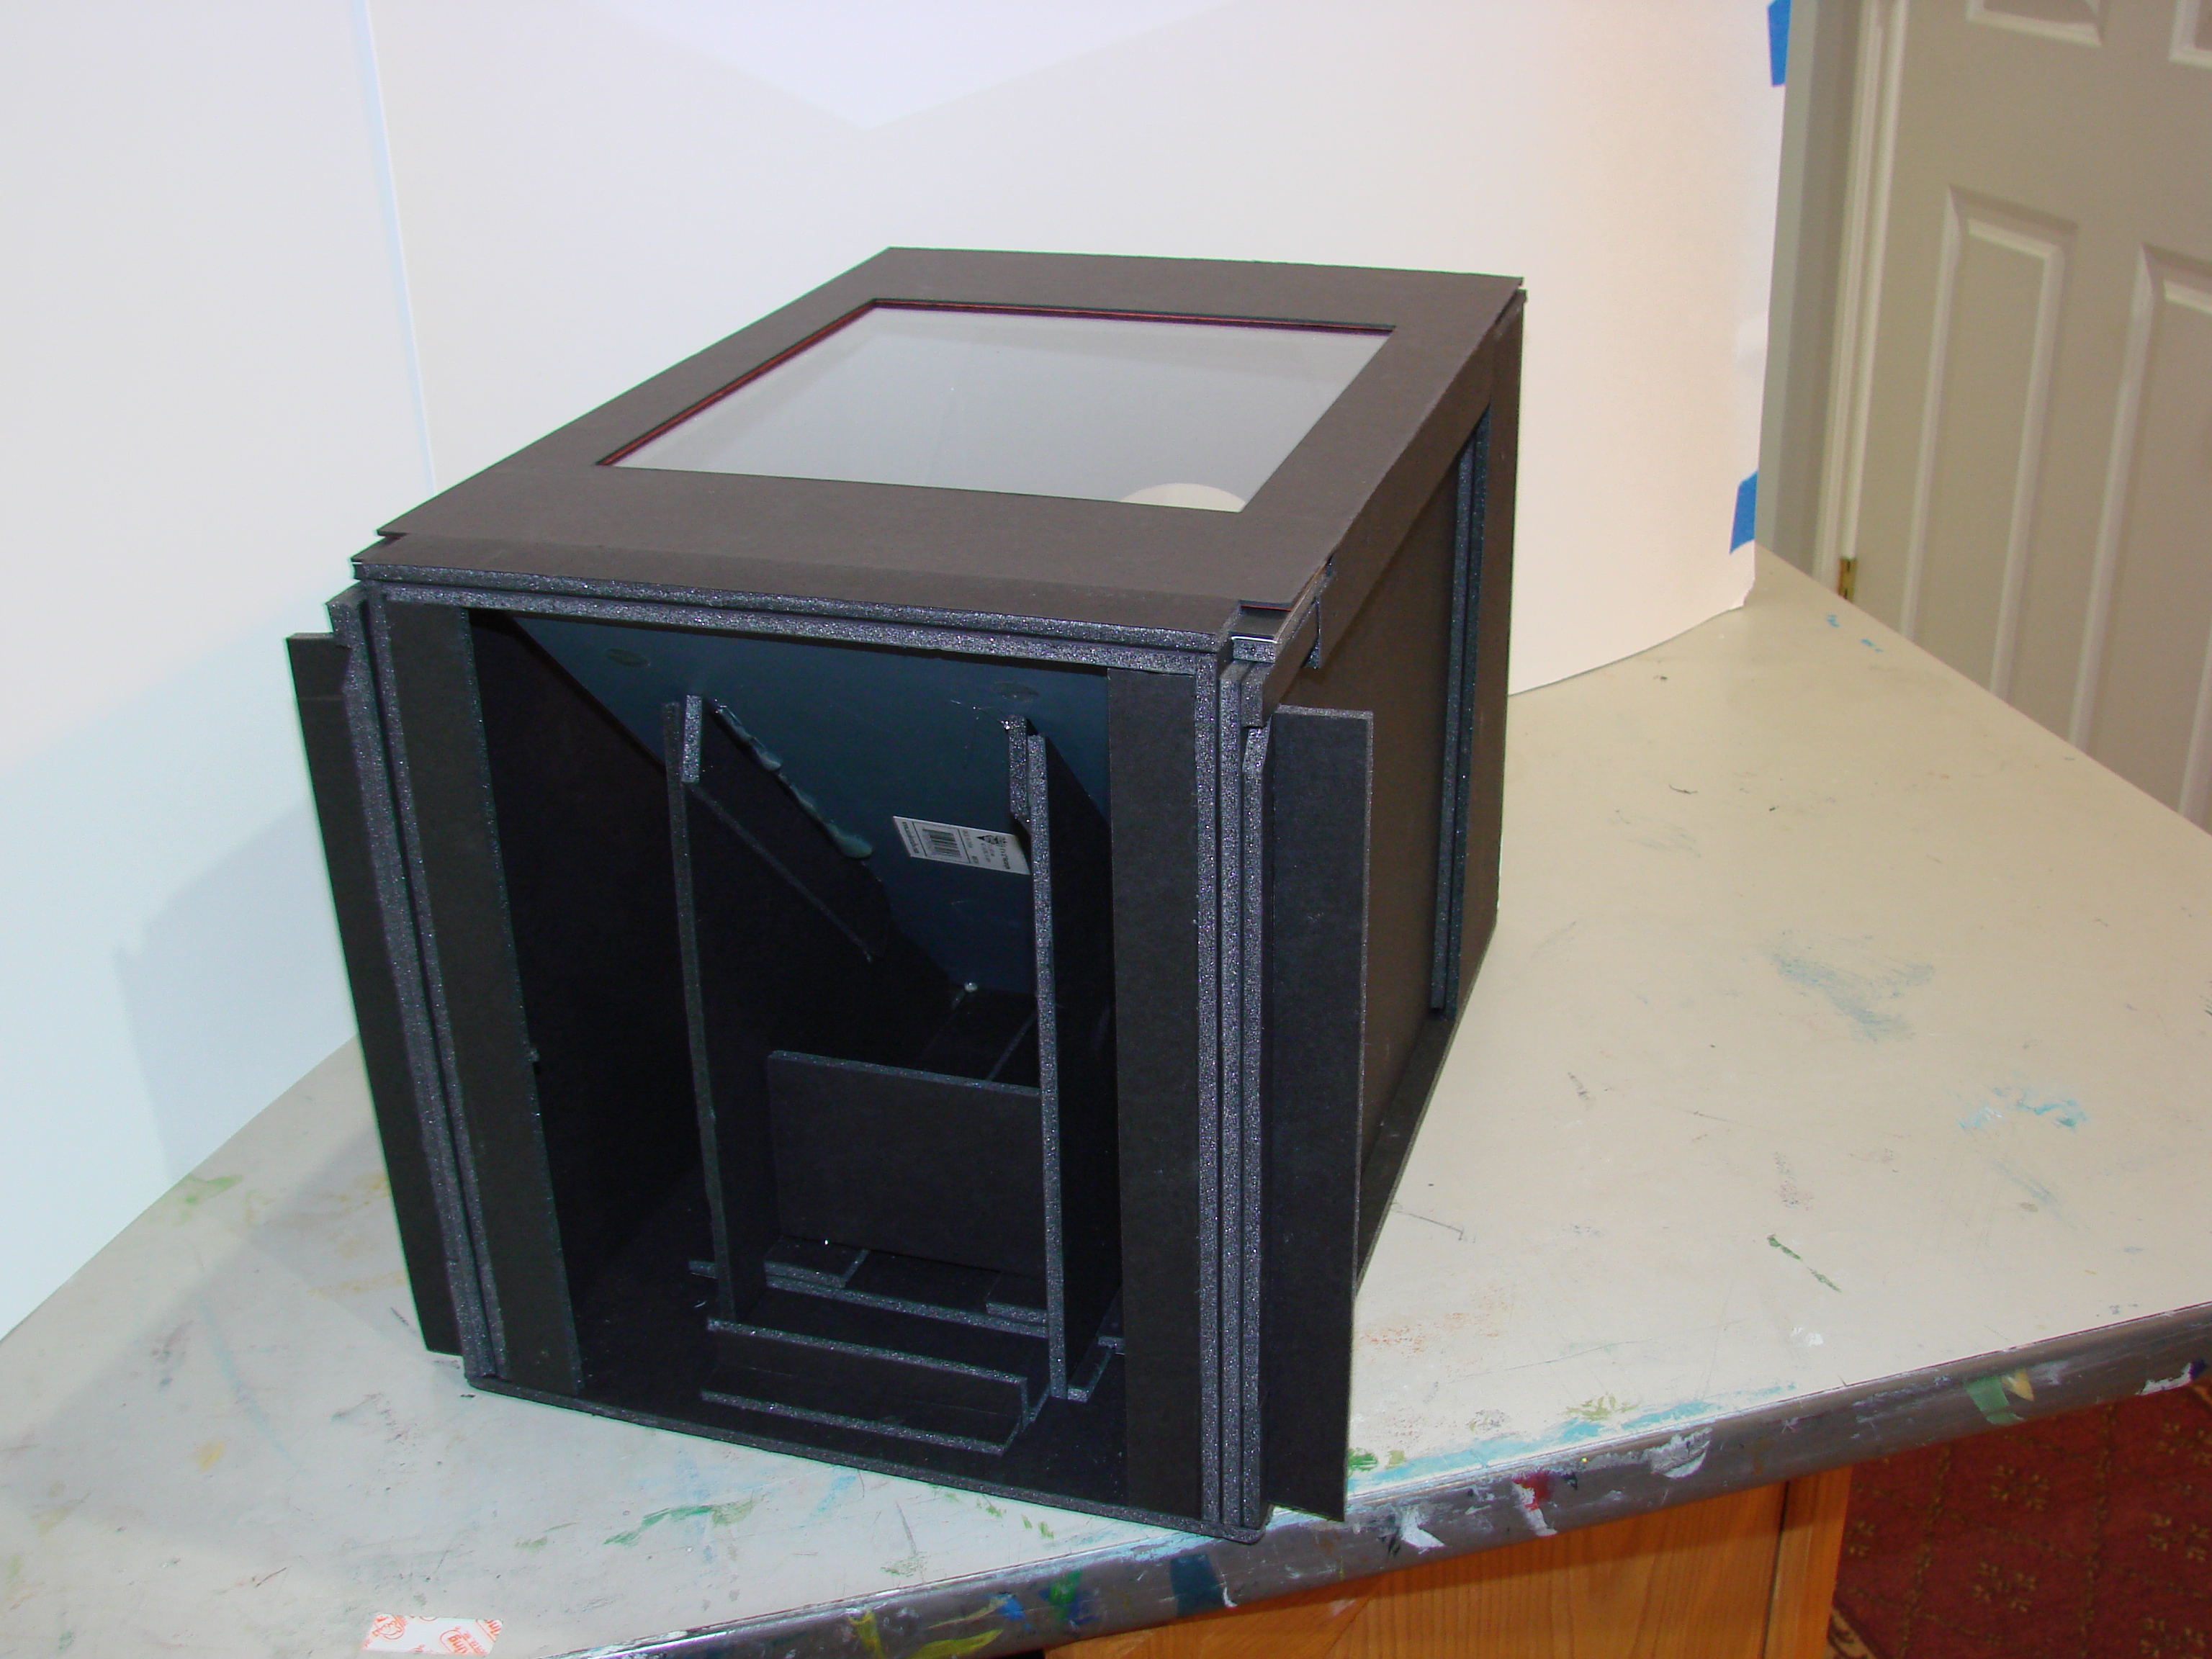
Photo 10. This is a rear view of the completed camera obscura with the top and side cover in place. I have added the corner braces and the holder for the glass plate. The top and sides can be removed as a single unit to reposition the lens cell in any of the three positions.
The case consists of the top with a 7 X 9 inch glass and two side panels. There is a cover that can be fitted over the top of the glass plate to protect it.
First Light, Exterior Views
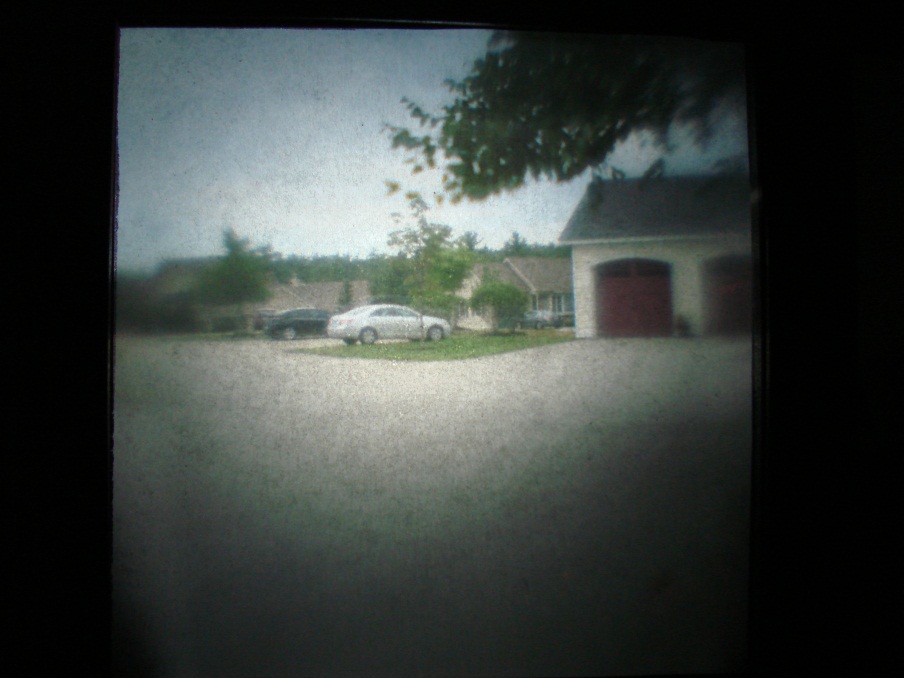
Photo 11. This is the adjacent condo looking through my studio window. The studio shades were pulled down, and black cardstock was placed around any stray light coming through the window. The day was slightly overcast. The building is approximately 75 feet away. The digital camera was positioned over the top of the camera obscura and focuses on the tracing paper placed on the glass plate. The image is right side up (standing at the back of the camera obscura) and reversed left to right.
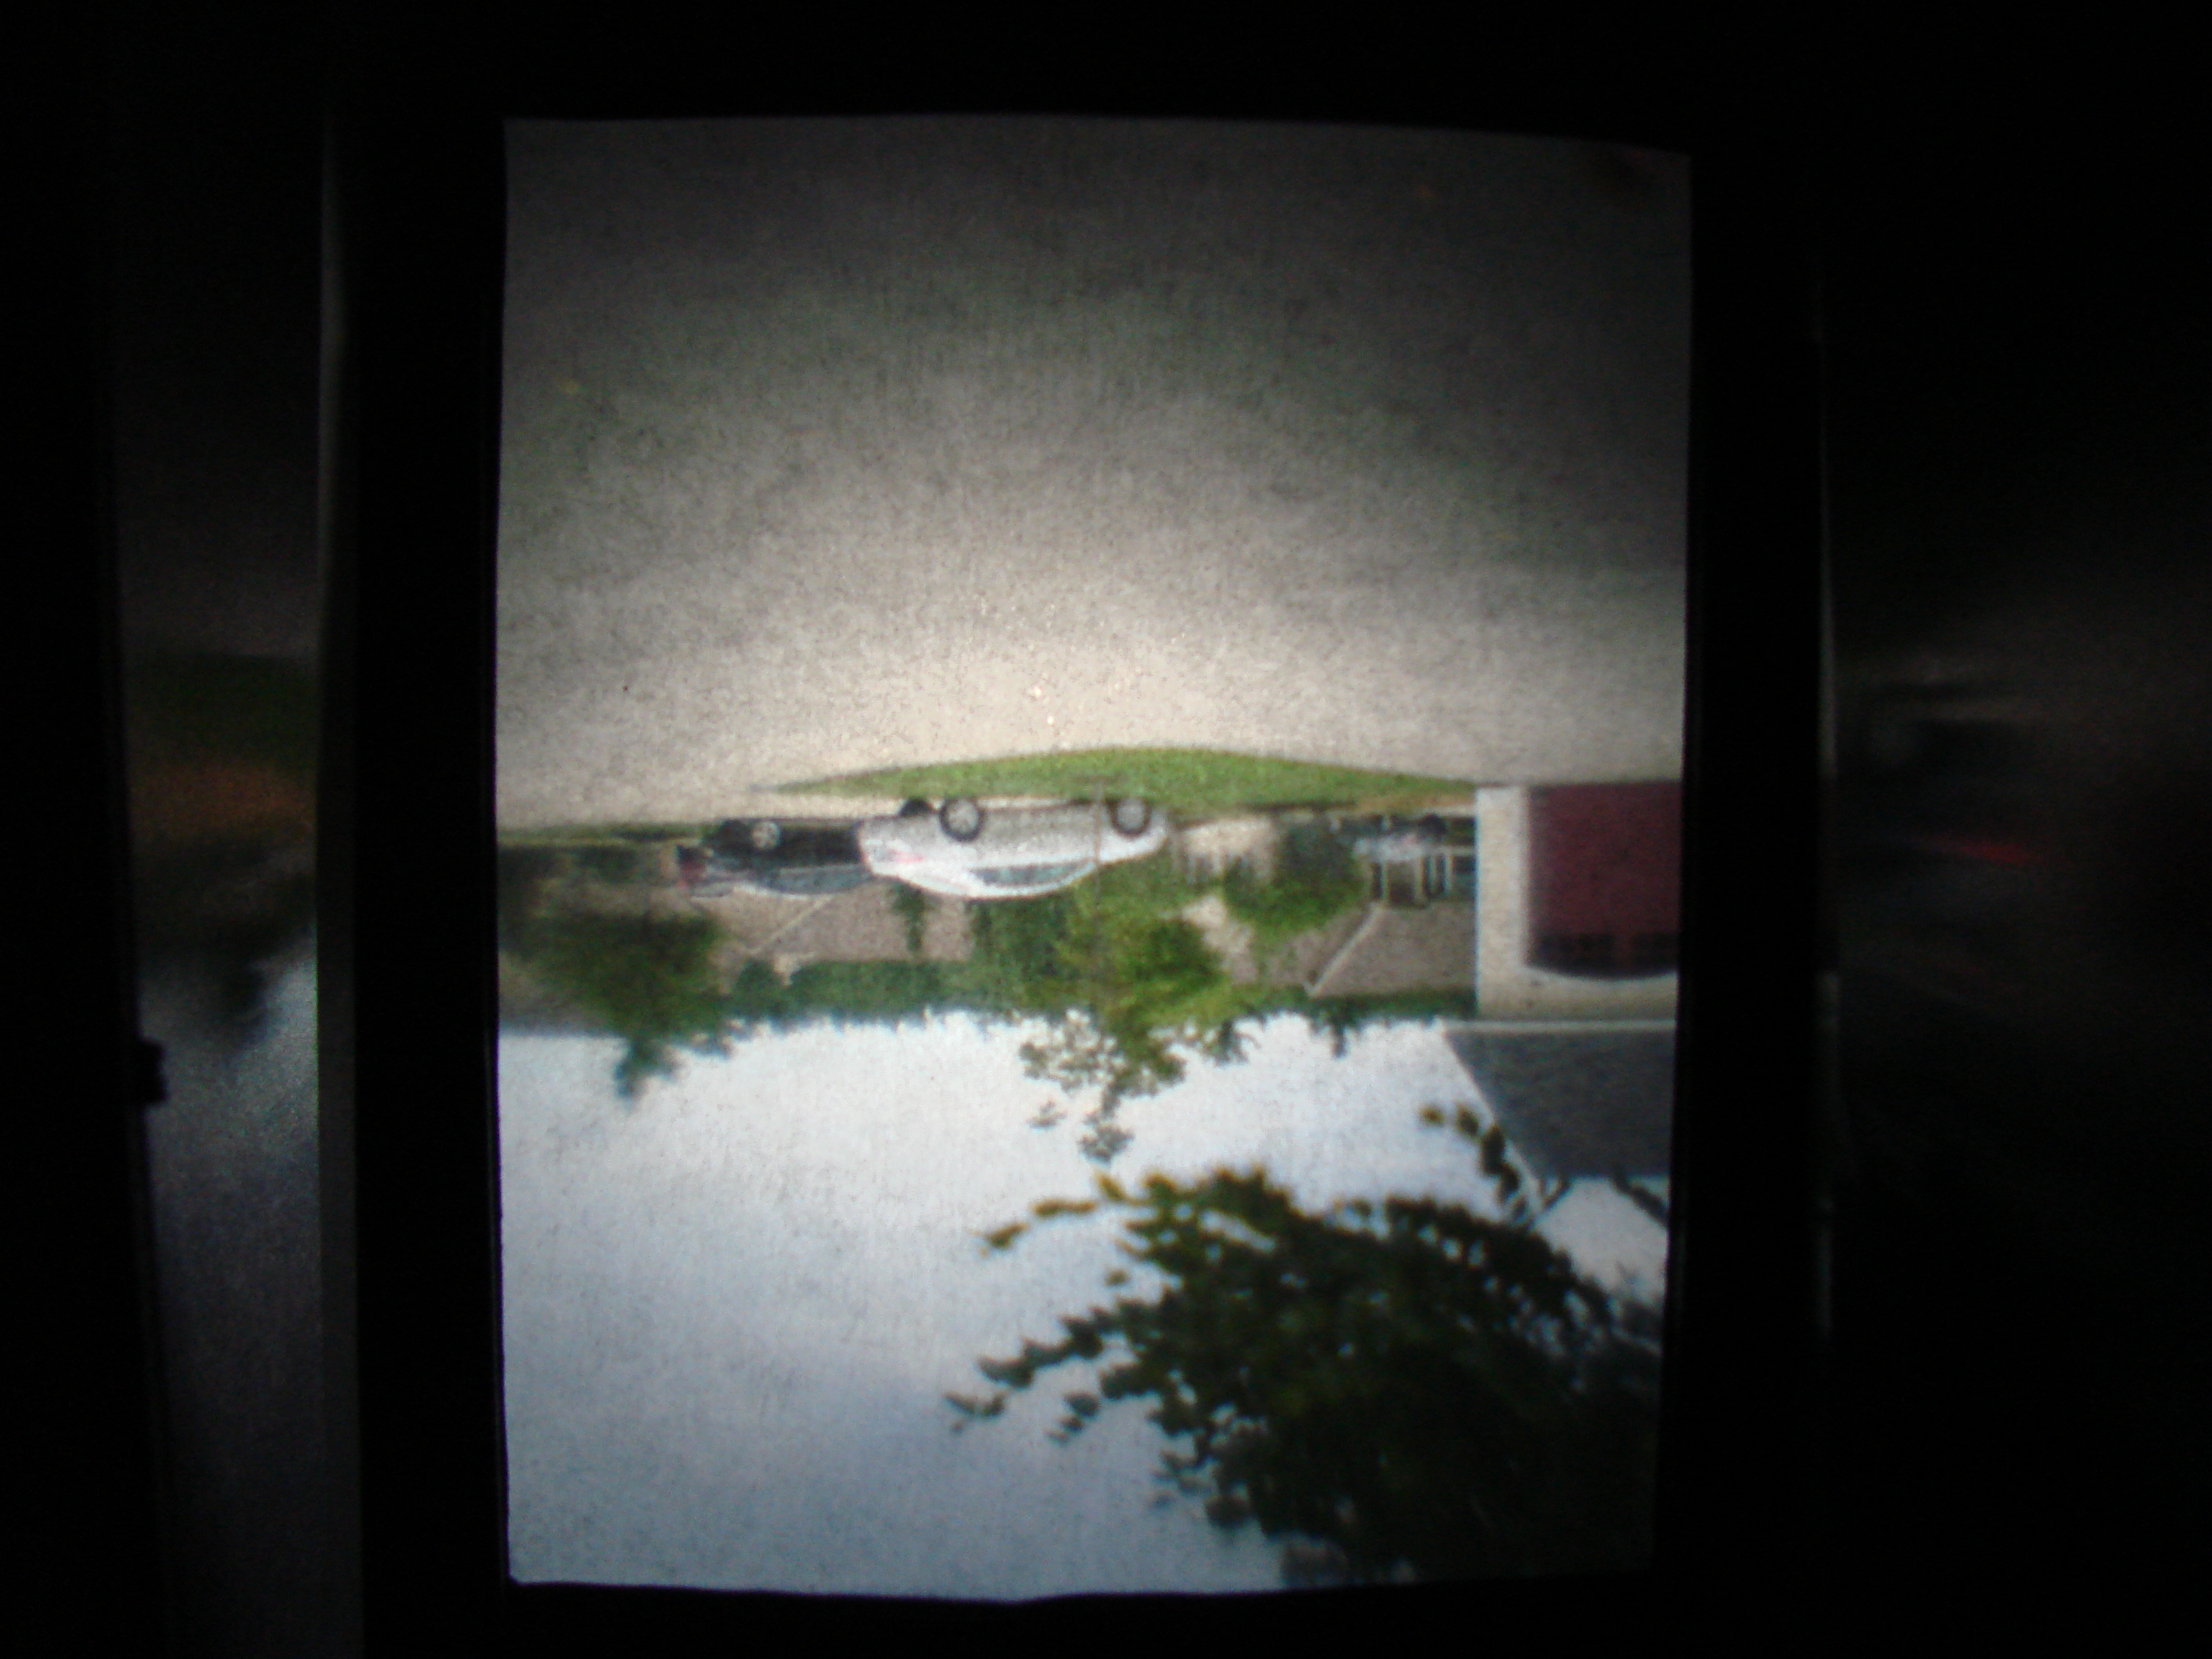
Photo 12. This photograph was taken with the digital camera looking through the back of the camera obscura (no mirror in place). The vertical sled had tracing paper inserted in the holder. The image projected onto this is flipped upside down.
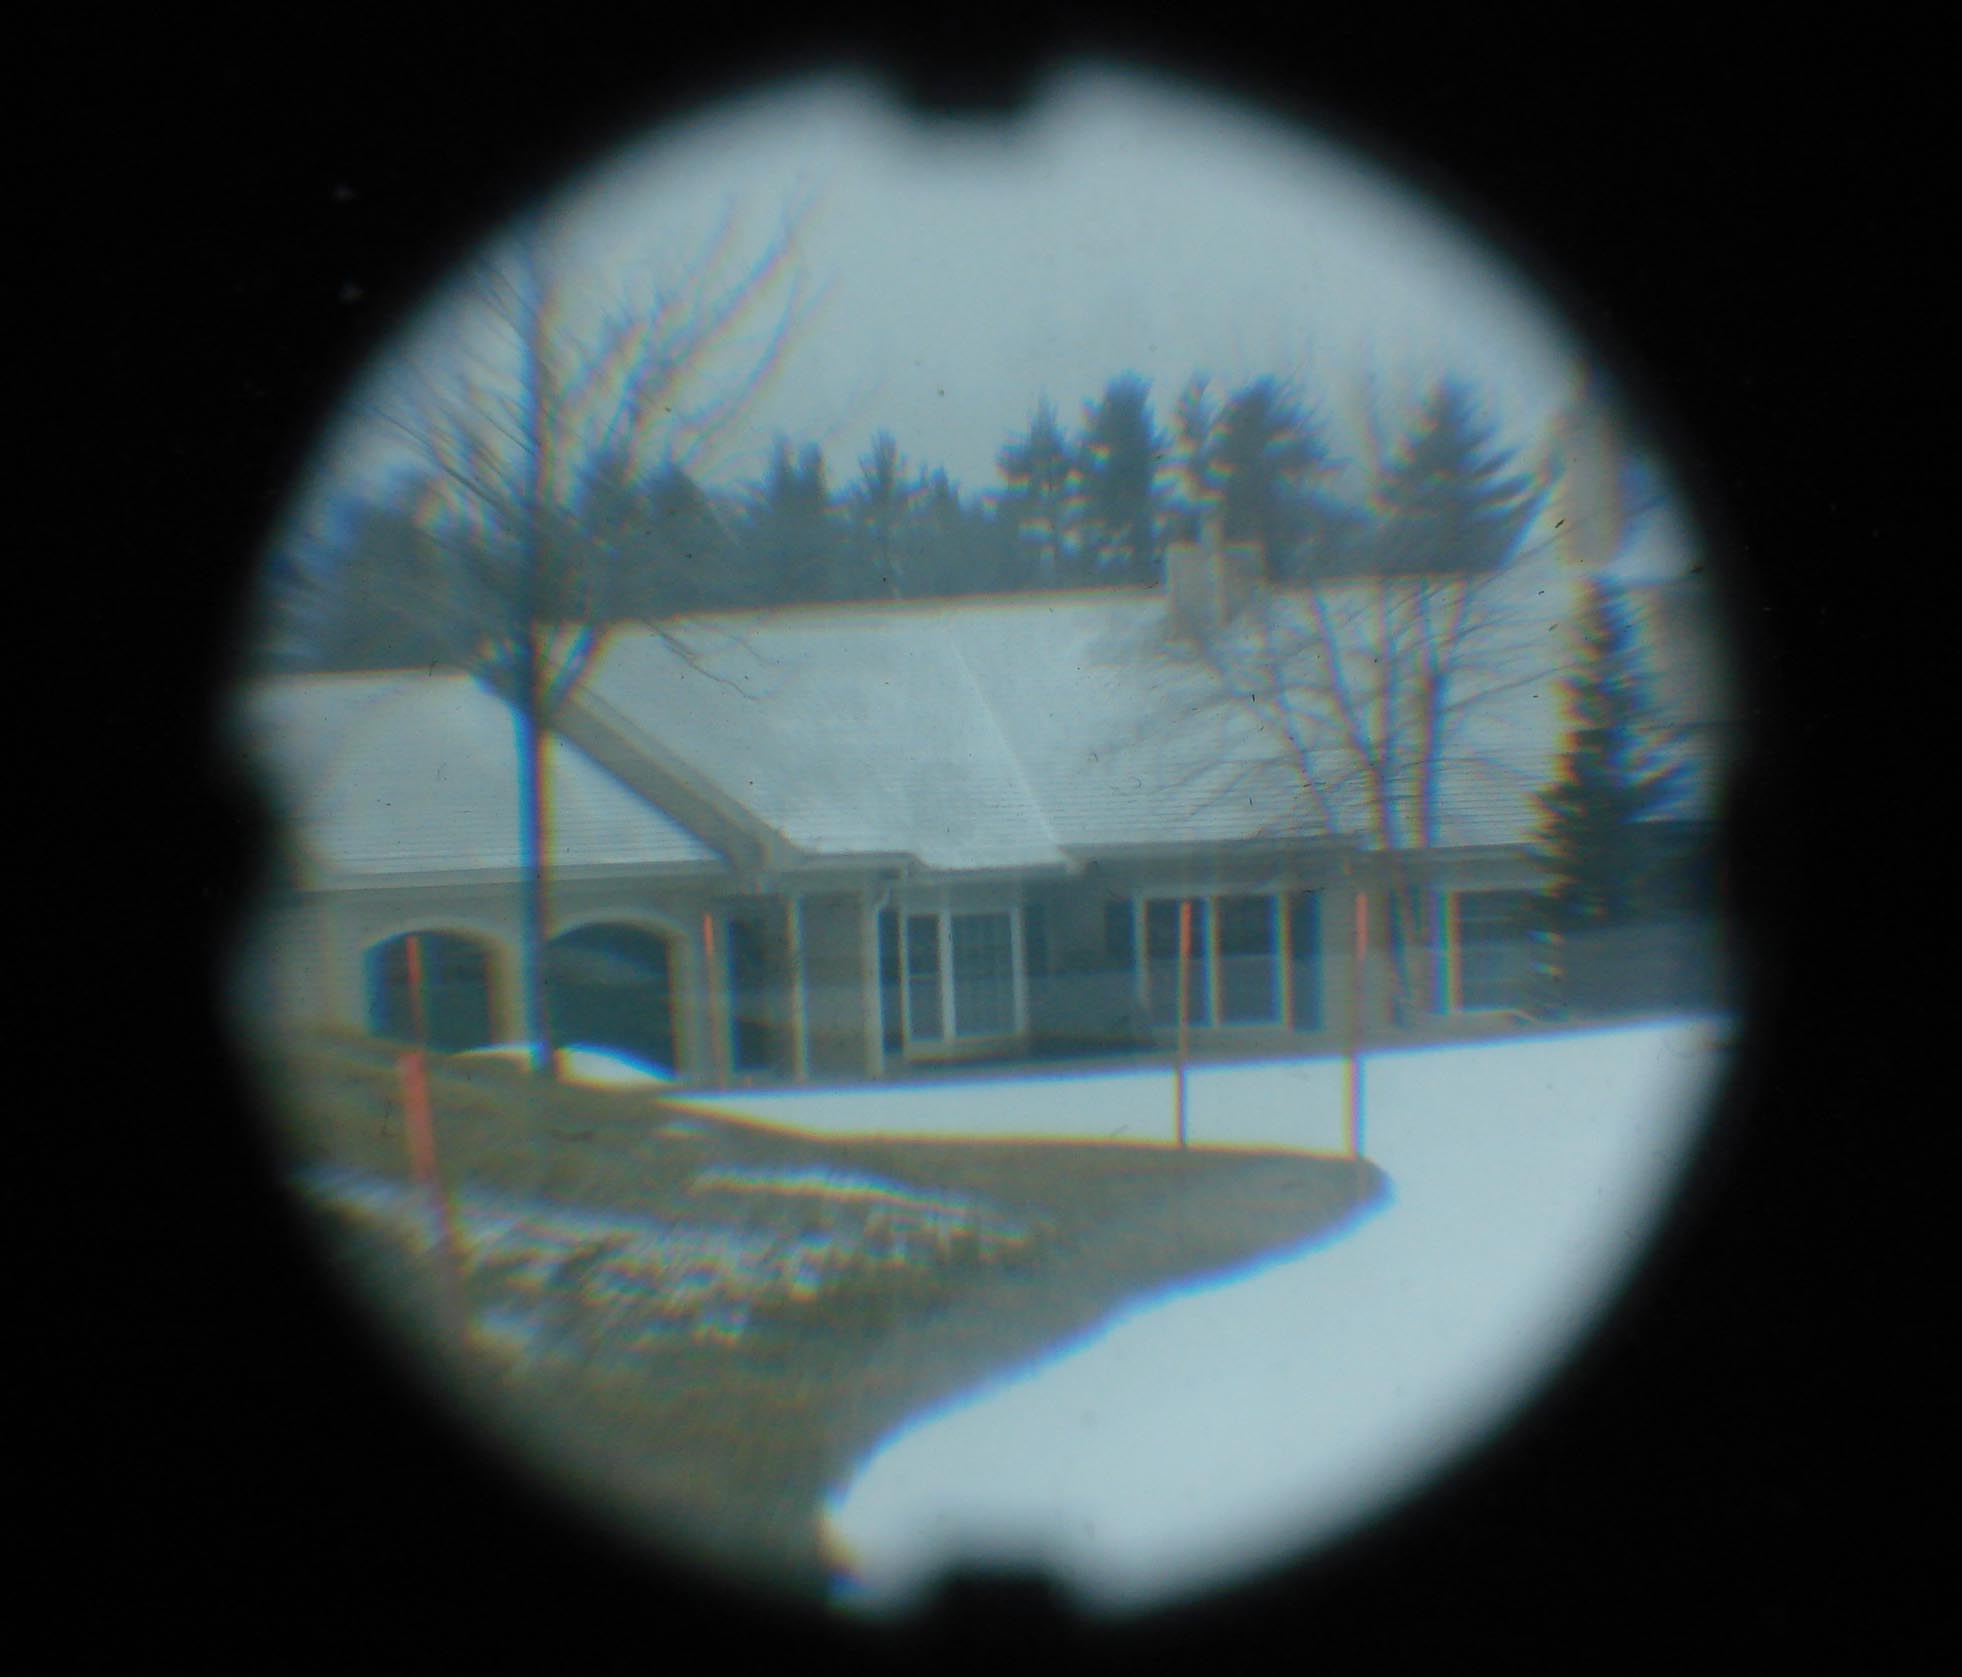
Photo 13. This photo was taken on a heavily overcast day during a snow storm. The building was approximately 300 feet away. The image is right side up, but reversed.
First Light, Interior Views
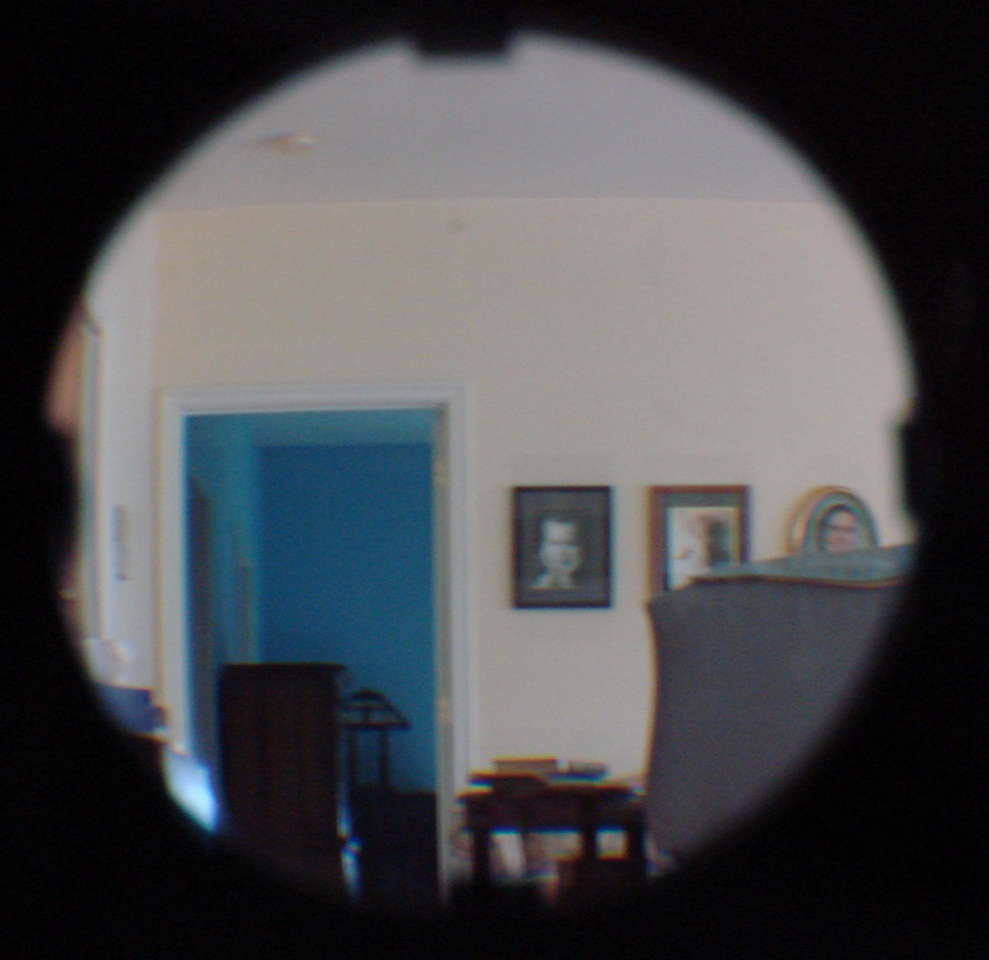
Photo 14. This photograph was taken from my studio, looking down through the glass (no tracing paper), reflecting off the mirror and out the lens. It shows my living room and far bedroom. The image is flipped left to right. The image is very clear without the tracing paper. The distance from the camera obscura to the lamp on the bedroom desk is approximately 50 feet.

Photo 15. The camera obscura was placed at an angle on my studio worktable. The photograph reflects off the mirror (no tracing paper on glass plate), and through the lens. This shows the far corner of the studio with some of my paintings on the wall at the right. Image is flipped left to right.
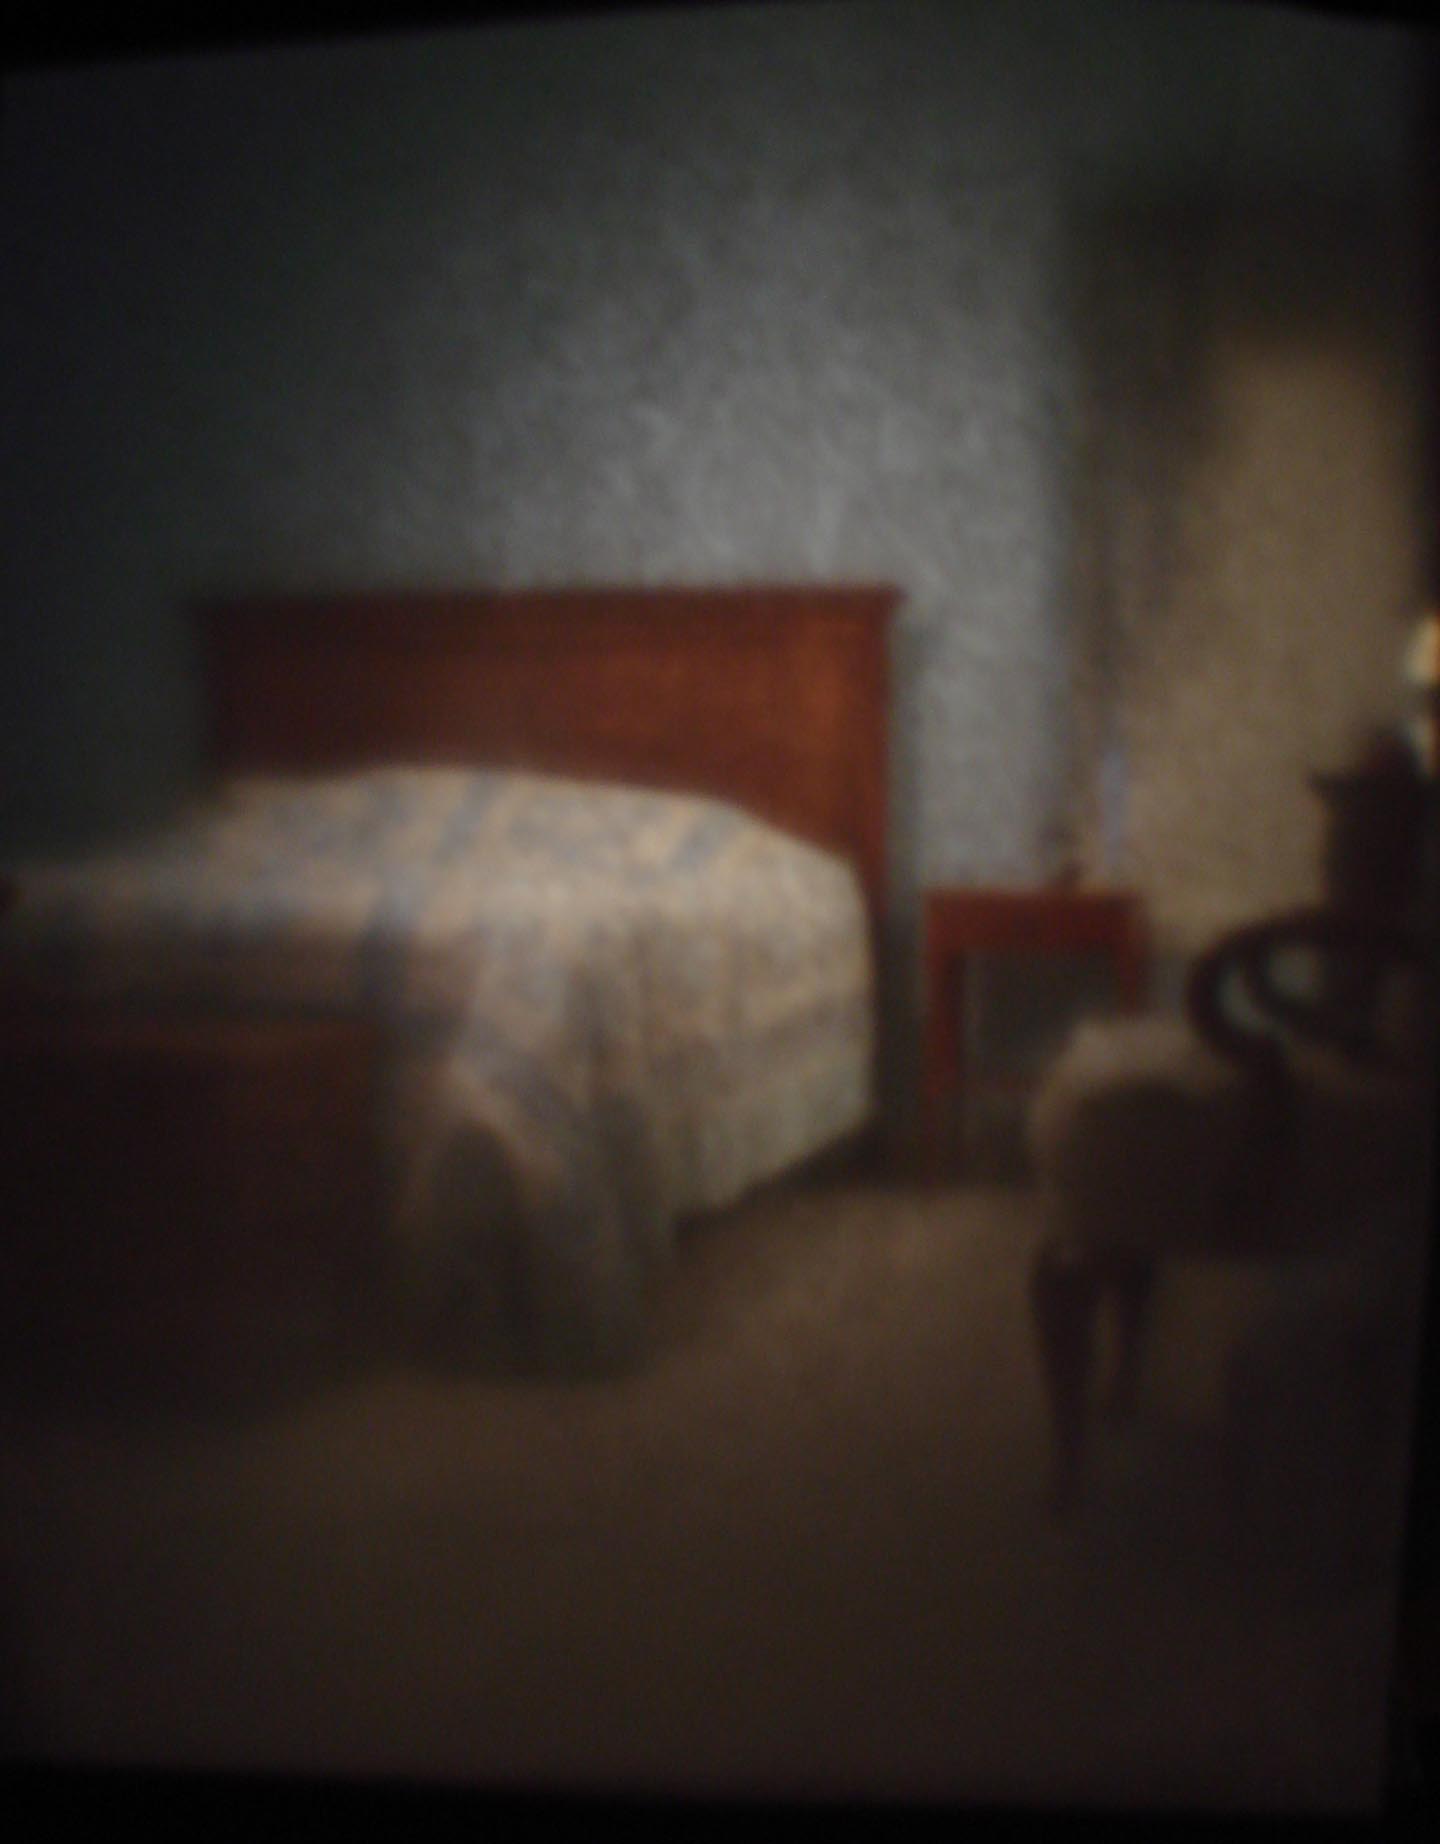
Photo 16. I placed the camera obscura on a small table in a darkened closet. I had several lights on in the adjacent bedroom. This photo was taken looking down through the tracing paper placed on the glass plate. The image is flipped left to right.
You can see how you can check perspective and placement of the furniture for composition. Better lighting in the bedroom and thinner tracing paper would produce a sharper picture. I liked the soft focus this setup produced. You could draw this image on the tracing paper and enlarge it with a grid as a first step to drawing on the canvas.
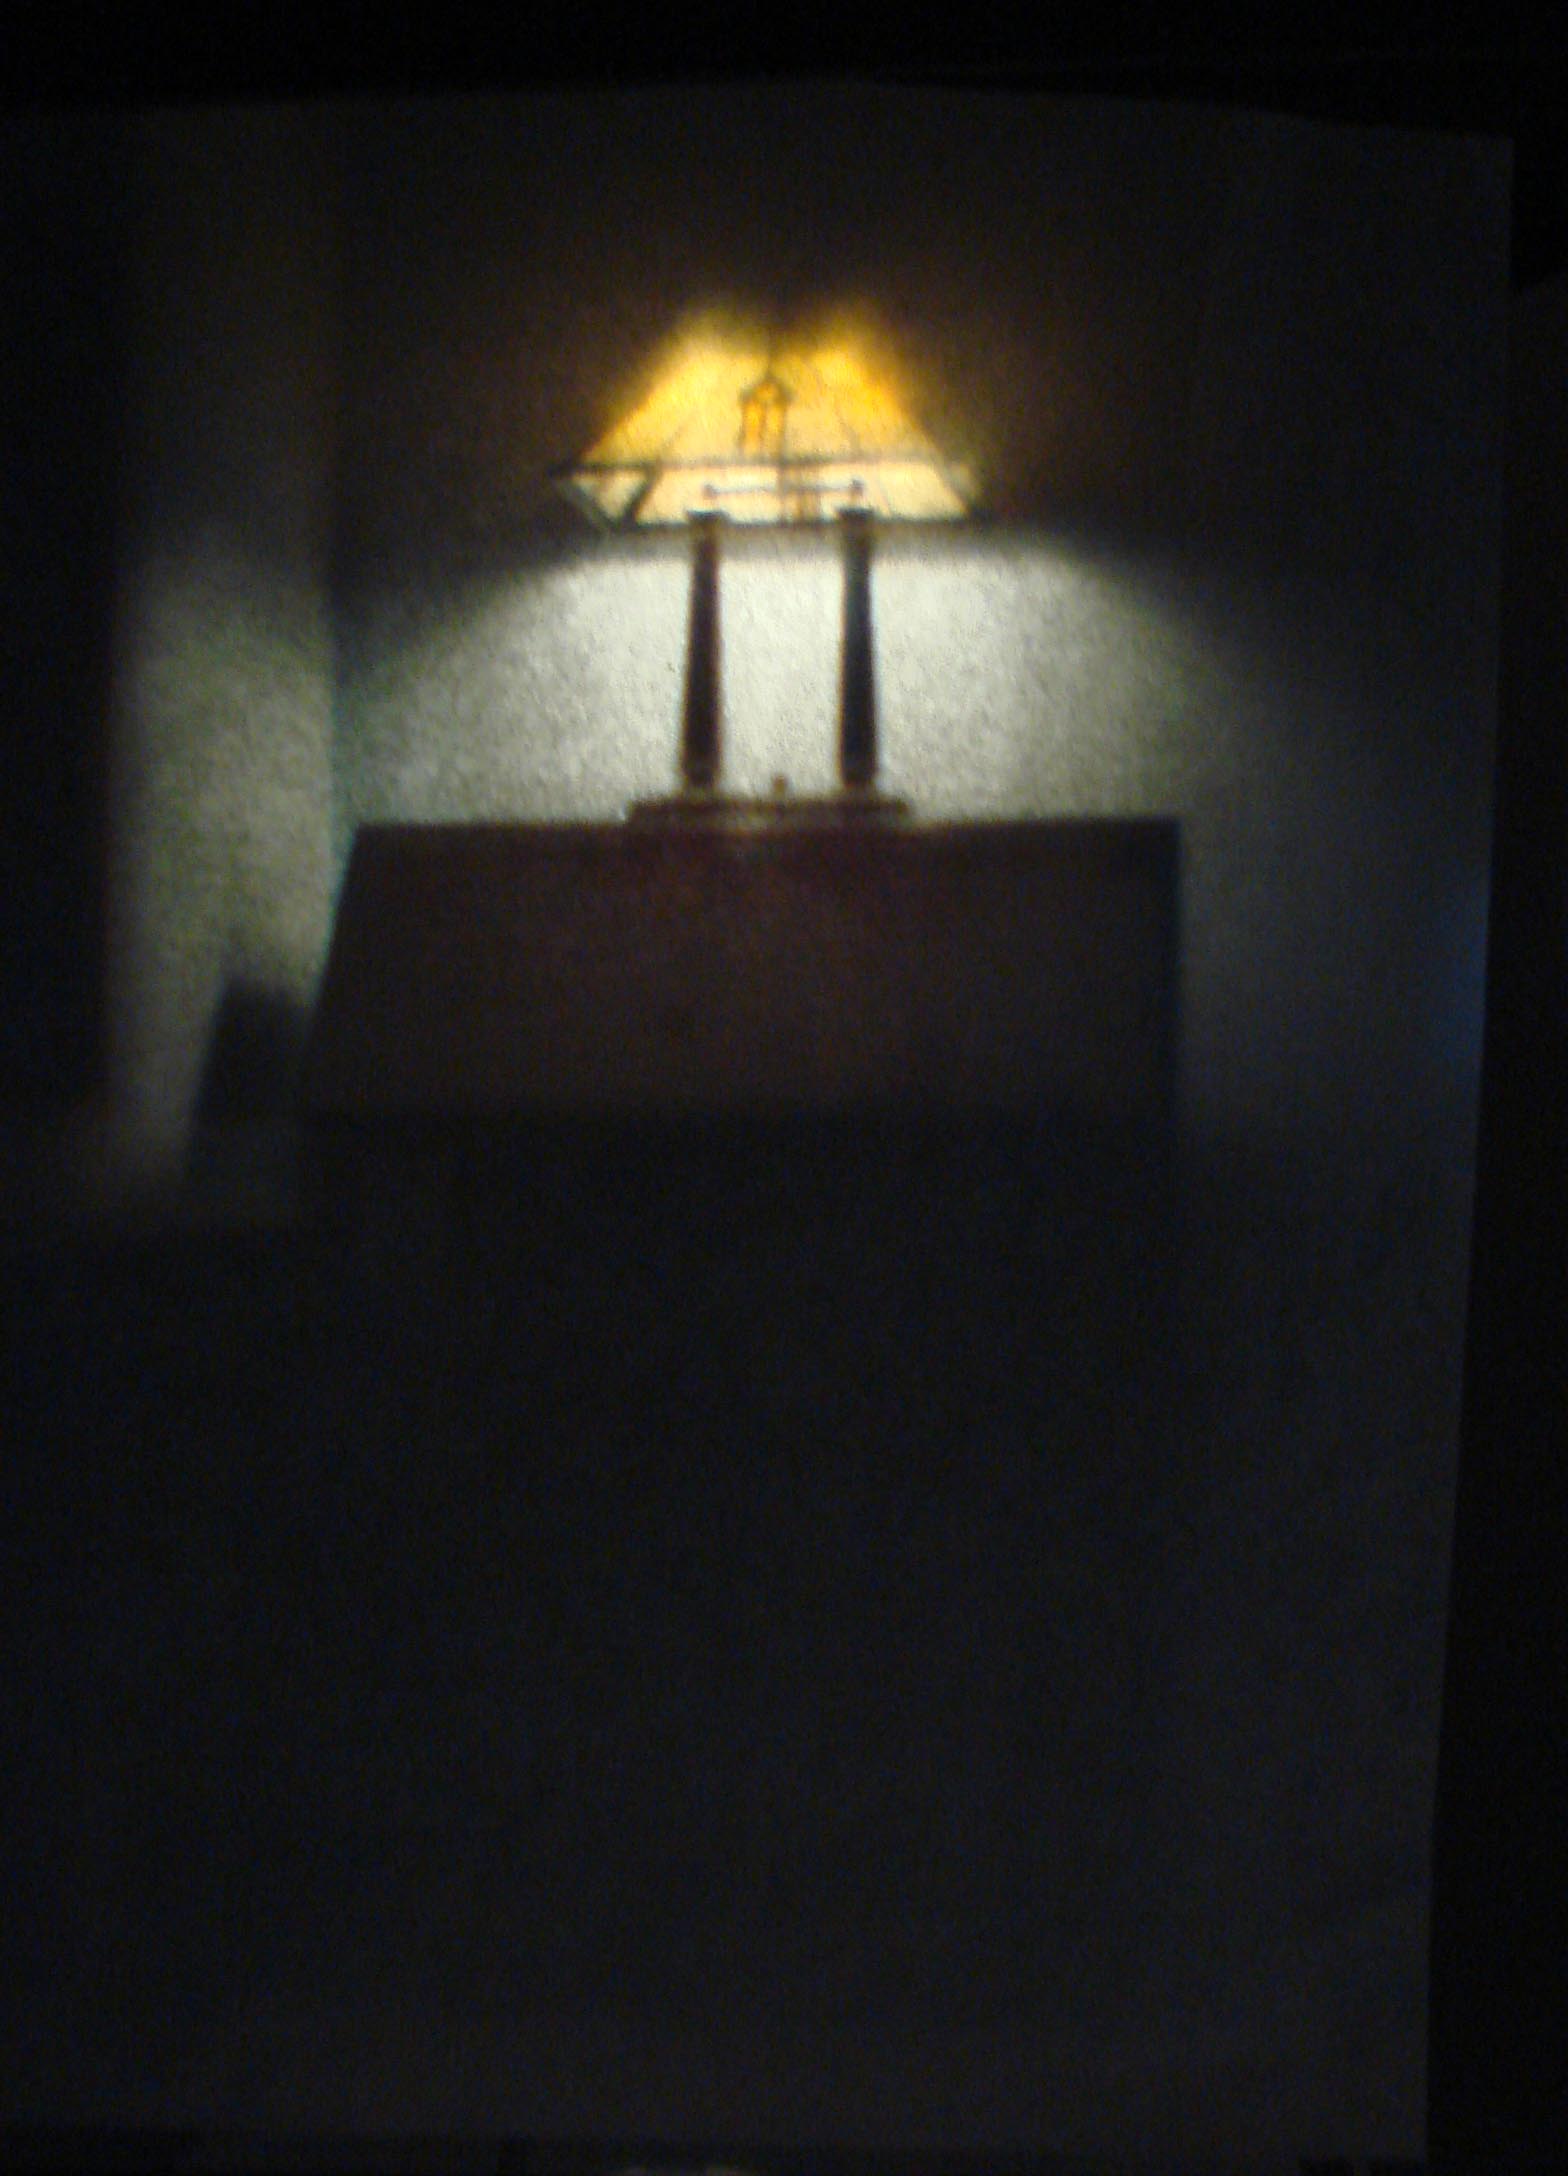
Photo 17. This is the lamp you see in the long shot toward the bedroom (photo 14). This was taken through the tracing paper, mirror and lens. The distance was approximately 12 feet. Again, the image is flipped. Note the cast shadows from the single lamp that was turned on.
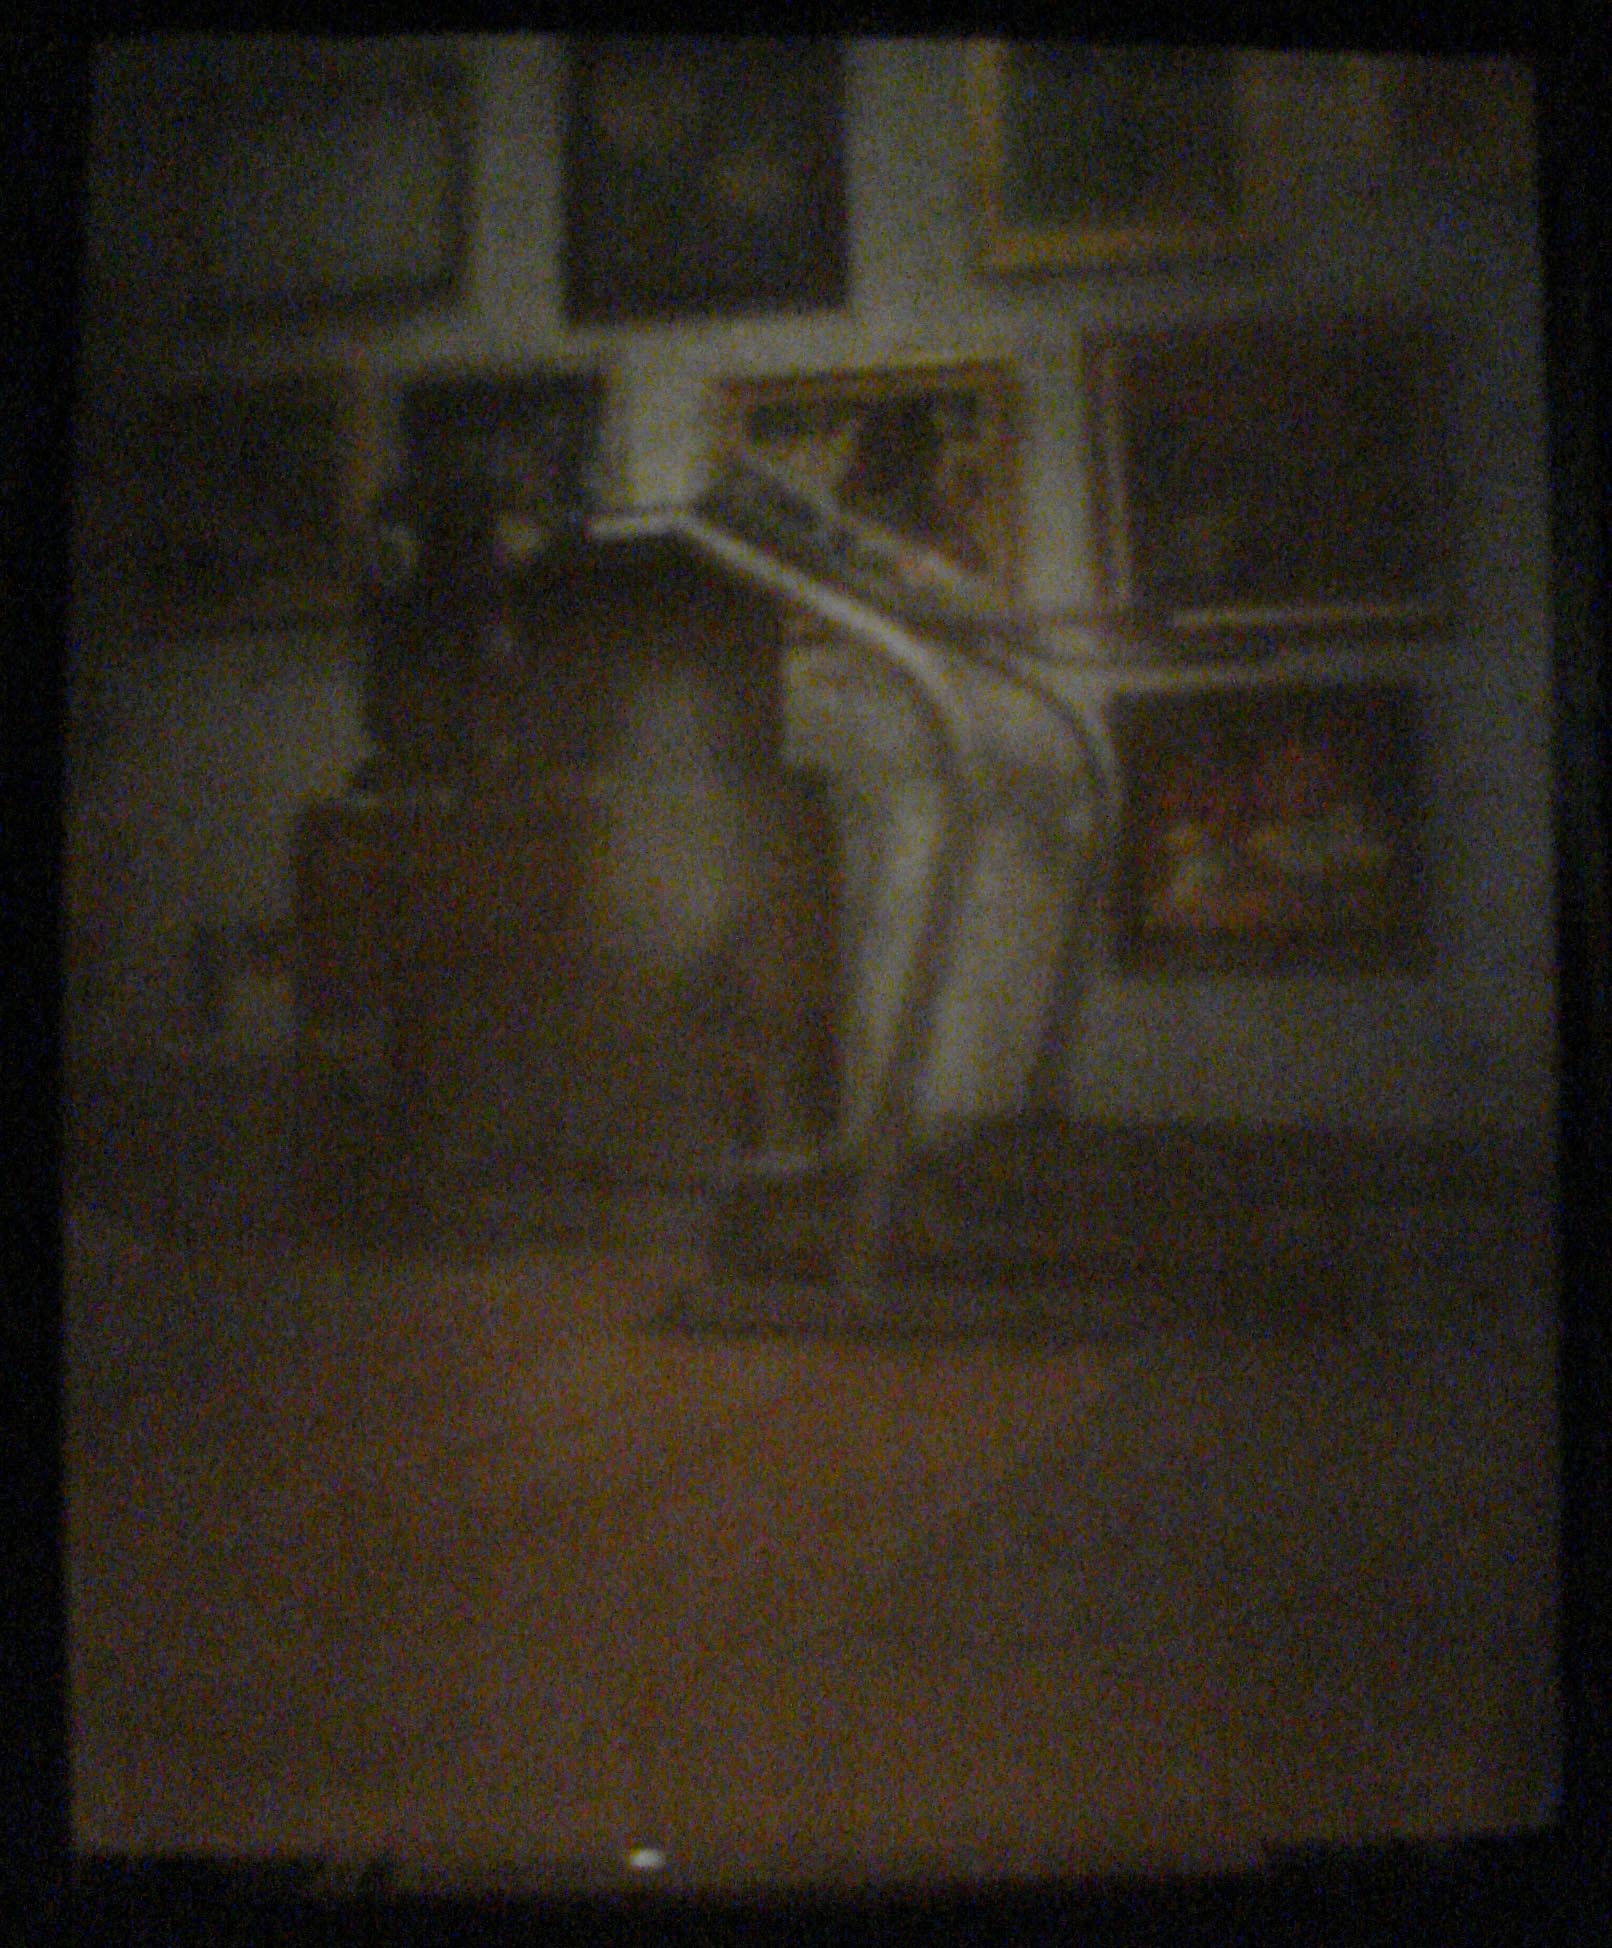
Photo 18. This is another photograph of my studio east wall taken from the dining room. This is the largest wall with three levels of paintings, a wooden chest, and our treadmill. Better lighting and thinner paper will produce a sharper image. Distance from camera obscura to wall is 15 feet.
What’s next?
While building the second model of the camera, I received an unsolicited catalogue for optical lenses from Anchor Optics, a division of E. O. Edmond Optics. This coincidence provided the initiative to build a third, fully functional room-size camera obscura described in the book Vermeer’s Camera.
I plan to contact this optical company, describe the goals of making the room-sized camera obscura, and determine what size and shape lens I would need to build that camera obscura. I’ll use the same general dimensions described in Vermieer’s Camera for the placement of subject, lens position from the subject, distance to the projected image, and the size of the projected image. I would like a 20” to 30” diameter circular image on the wall opposite the lens. Hopefully, there will be a standard size lens available that would meet all of these requirements.
The lens would be placed in the wall of a small, dark, enclosed space and would project an inverted image on a canvas placed on the opposite wall of this space. The projected, inverted image would be drawn on the canvas in preparation to developing a painting.
I would encourage any artist to read this entertaining and informative book.
Don Whittemore
E-mail donsfineart@comcast.net
Web site www.donsfineart.com


Cool! I run the education department of a museum, and I think I’ll try this.
Hi Don,
Thanks for sharing, it was an amazing project. I am a photographer and artist, I love Vermeer also and I teach children. One of our projects was to build a pinhole camera, but I can see that yours works beautifully. I really would like to tray that with the kids but unfortunately most of the images are lost. I had had that problem myself in some of my blogs, I don’t know if you are aware of this, but I just wanted to let you know.
Your work is beautiful.
Victoria
Hi Victoria, thanks for your kind comments and the heads up on the photos for the camera obscura. About 10 photos went to cyber space! I’ll get these up in a few days. Internet happens.
Best wishes, Don
Great job. Really inspiring.