
September Beets
24 X 20 2009
Acrylic on canvas
Inventory # 108, $750
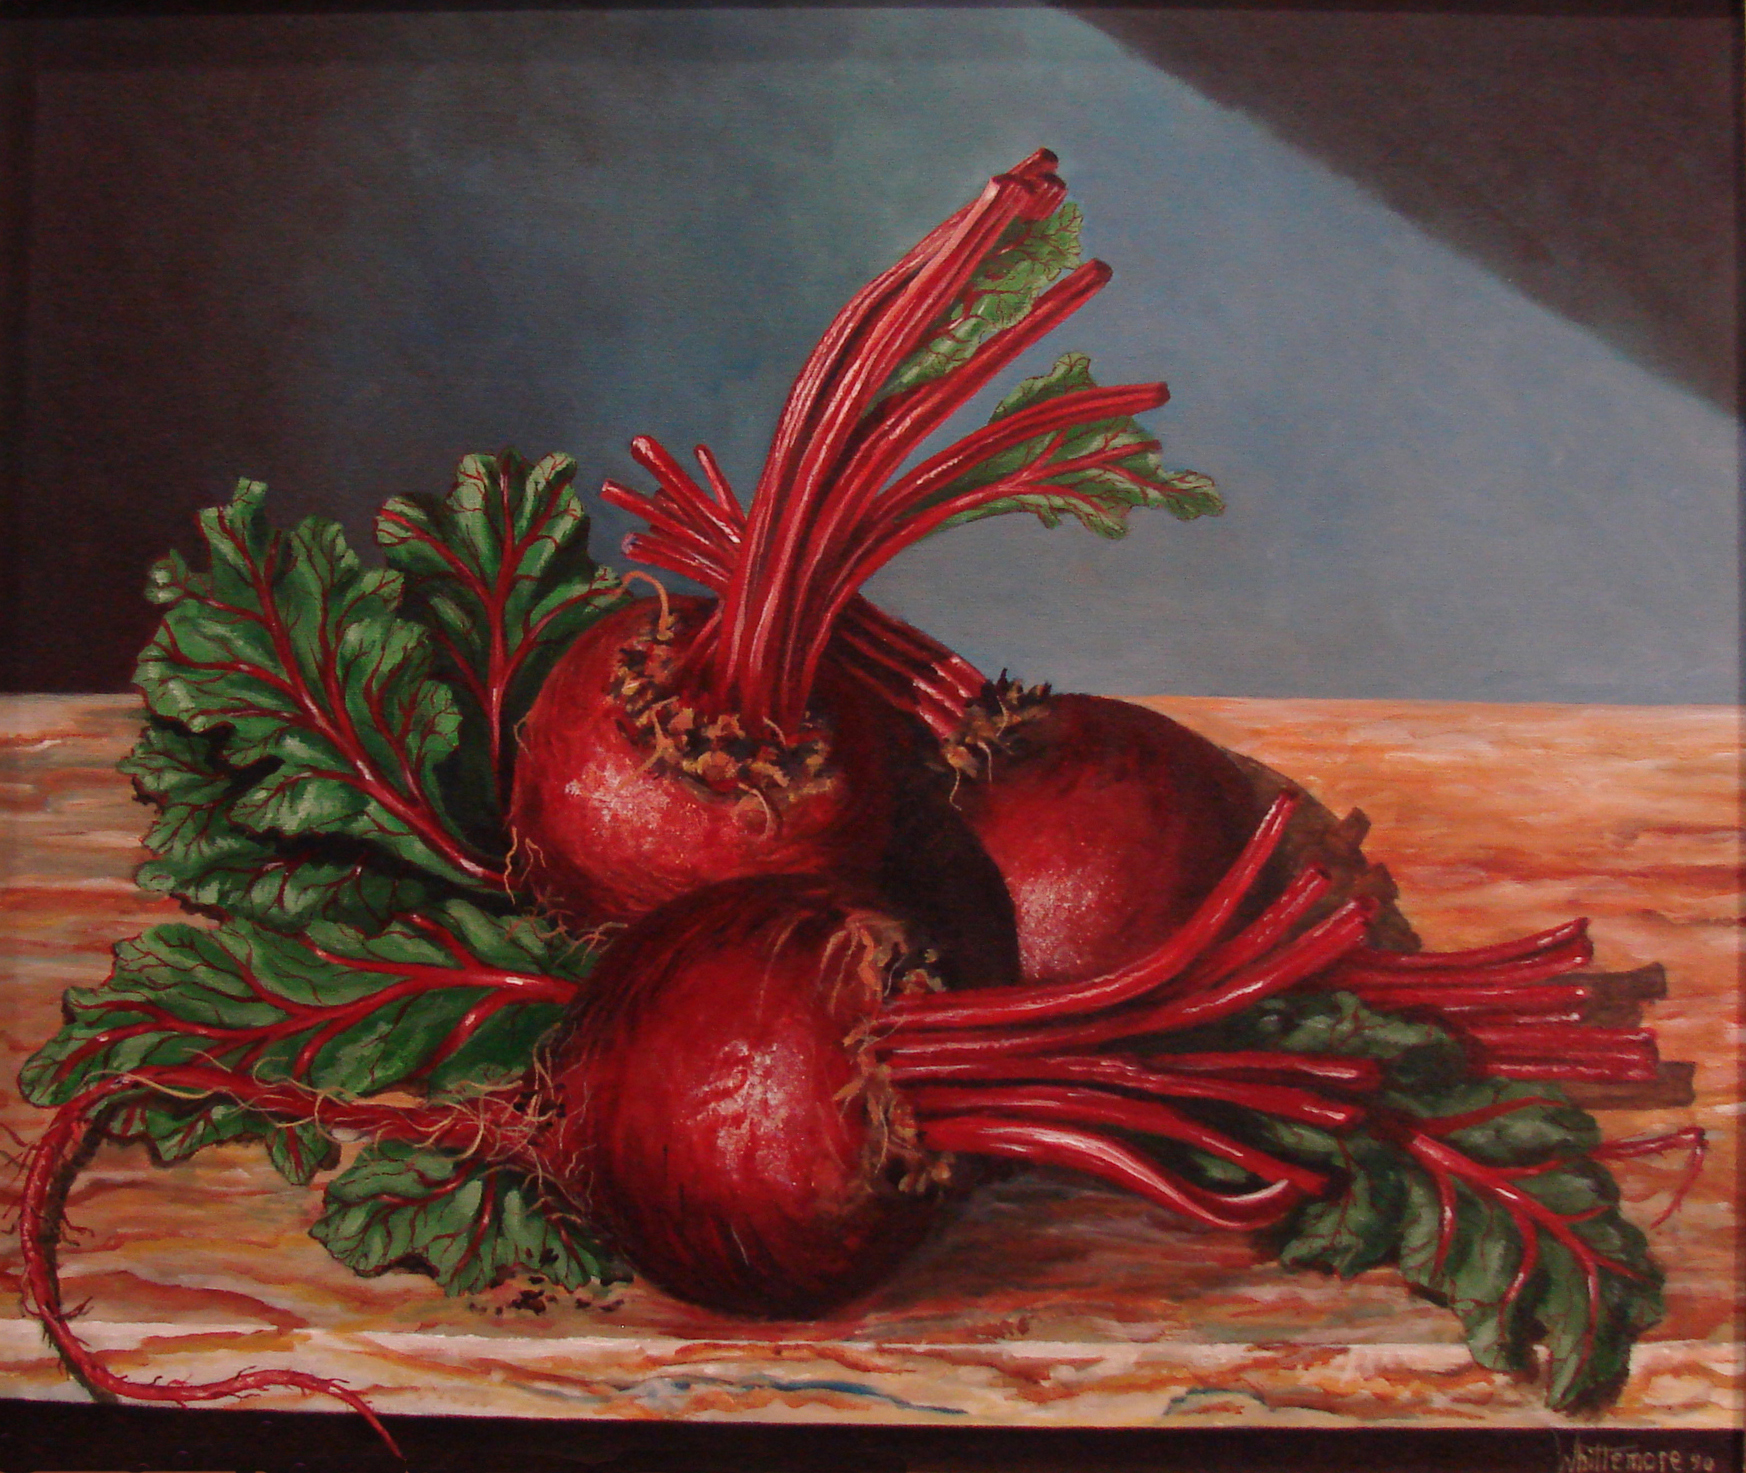
We purchased a large bunch of beets at a local farm stand in the morning, photographed them in the afternoon, and baked and ate them for supper. The earthy aroma in the kitchen was intense when we cut the greens off, and the flavor of the hot beets at supper was wonderful. There is nothing like our fresh, locally grown New England vegetables. The next morning I began the painting.
September Beets, The photograph.

I selected three beets and placed them in a shallow, white bowl in full sunlight on our dining room table. I took several photos arranging and re-arranging the position of the beets and the angle of the shots. I picked the best shot and used Adobe Photoshop Elements to crop out the unwanted background. I printed the photo and laid out a five square by four square grid on the photo using the back edge of an Ex-acto knife and steel straight edge.
I used the back side of the blade and pressed lightly on the knife as I pulled it along the straight edge. This removed the ink without cutting the paper. I decided on a 24 X 20 inch canvas for this work, and prepared the already primed canvas with three coats of gesso applied with a three-inch, short nap roller. After each coat is thoroughly dry, I sand it lightly with 120 grit sandpaper.
September Beets, The Palette:
Background layout: Burnt sienna, cerulean blue, burnt umber and white.
Background under painting: Burnt umber, cerulean blue and white.
Beets under painting: Hooker’s green, sap green, windsor blue, and white.
Beet greens under painting: Cadmium red, acra red, hooker’s green and white.
Beets over painting: Acra red, cadmium red, and windsor blue.
Beet leaves over painting: Hooker’s green, sap green, cadmium red and white.
Stem over painting: Acre red, cadmium red, white and Winsor blue.
Shelf: Burnt sienna, yellow ocher, white and cerulean blue.
September Beets, Step 1: Background and Layout.

I laid the canvas on the work bench and wet the surface with the eight ounce spray bottle of water, with a few drops of dishwashing detergent added to it. I quickly brushed on a very thin coat of burnt sienna with a one inch brush. I left a little of the white gesso showing through by blotting off the heavier areas of paint with a crumpled-up rag. Immediately after this, I dipped my fingers into a large jar of water (with a few drops of dishwashing detergent added) and flicked a lot of water drops all over the canvas. As this started to dry, I saw the area where I flicked the water start to get lighter near the centers, and some paint migrated to the edges of the drops. I wanted a splotchy sort of effect here, and by adding a little soap to the water; it helped break down the surface tension of the water/paint mixture and the color flowed much more loosely.
Then it was time to use the hair dryer and rag to move the paint around and blot off paint that was too thickly applied. I sometimes do this part a couple of times, and sometimes use a second color. One of the goals is to kill the stark white of the canvas. The other goal is to have a toned surface, so when I lay on washes and scumbles, they will cover better than the white canvas and produce a richer tone with the next color.
I drew the five square by four square grid on the canvas with very thin cerulean blue and a t-square. I held the t-square down firmly, rested my little finger on the edge, and drew the line about a quarter of an inch away from the t-square. If the tip of the brush is too close to the edge of the t-square, the paint will be drawn under it by capillary action and make a mess of it. Next, I quickly drew in the beets with thinned cerulean blue. I used thinned burnt umber to sketch in some of the beet greens and thinned white to indicate the shape of the bowl. Note that the beets fit into a triangle I sketched in with blue as an afterthought. I also played with the colors and value of the background in a couple of areas with a combination of burnt umber, cerulean blue and white. The light source is in the top left corner of the painting (white arrow) and I wanted the background darker on the left, and getting lighter toward the right side. The beets would be brighter on the left side and darker on the right side. This would make a strong contrast of light against dark as you will see further on.
Now was the time to employ some of the artistic license we are given each time we pick up a brush. I was going to paint the white bowl, but changed my mind and considered a shallow, loosely woven basket. In the end, I went with a sort of tan, marble shelf. This simplified the arrangement and forced the eye to focus directly on the beets. This is the spot where I let a painting simmer for a while. I put the painting aside for a day or two and glanced at it often.
I also held it up to a mirror and turned it upside down to get a different perspective on the arrangement. If I sense something is wrong, I fix it now. Sometimes a mistake becomes oblivious, or a better way to arrange the painting will come to light. It is very easy to make the correction before I’m too far into the painting. I find that these mistakes will plague the painting to its end if not corrected immediately.
September Beets, Step 2: Background and Under Painting.

Under paint the background. I used burnt umber, cerulean blue and white painting with a #8 round brush. Starting from the left side, I used more blue and brown to start. I lightly misted the surface with the two ounce spray bottle, and scumbled the colors on using relatively thin paint and a random scrubbing motion, going every which way. I gradually added white as I worked across the canvas. I can’t get the job done in one coat, so several applications of the thin paint scumbled over the surface are necessary. The background was worked wet in wet, and it takes a little practice to do this with acrylics. This is where the two ounce misting bottle works well. The misting helps keep things wet, but if I go back over an almost dry section, I’ll pull off more paint with the brush than I first put down.
It’s better to wait until it is all done and dry, then apply another thin scumble. When I applied the second scumble on the background, I reduced the size of the greens to the left a bit. The shelf was painted with the same colors, but I made a little more of a gray tone.
Under paint the beets and leaves. I under painted the beets and greens with the opposite color of what I want the final color to be. It does sound strange, but it works for me. I used cadmium red and acra red for the leaves and veins in the leaves, and hooker’s green, sap green and a little white on the beets. I added a little Luquitex Acra Red to the green to darken the shaded side of the beets. The stems were roughed in with sap green and white. After letting it simmer again, I saw the misshapen top left beet, and the stem of the beet bending forward seemed wrong, so I adjusted both.
I indicated the transition from the beets to the stems (the collar) by rough painting in a dark color with Windsor blue (or Pthalo blue), burnt umber, and acra red for the base coat of this detail. I added some leaves to the right. I then painted the root of the front beet curling within the visual frame and hanging over the front edge of the shelf for a little interest and depth. At this point I continually adjusted light and dark areas, main shapes, light and shadows.
September Beets, Step 3: Over Painting.

paration with the gesso, so I can start with a relatively smooth ground. Now is the time I undo some of the previous work I’ve done. If the painting were on a Masonite panel, I would use a rubber sanding block and some 120 grit sandpaper to lightly sand the entire surface.
I wanted to knock off any peaks of paint, and peaks of gesso and start with a fairly smooth surface for the over painting. I sanded just enough to produce a speckled appearance where the gesso shows through from the tiny peaks that the sandpaper took off.
On this canvas, I cut a standard sheet of sandpaper into thirds. I triple folded a long strip in thirds. I lightly sanded the entire canvas using my fingertips to apply the light pressure needed. I would use very gentle, circular motions, applying less pressure in the area of the stretcher. If the canvas had a stretcher across the middle, I would use light pressure here, too. Sanding too hard over any of the edges of the stretchers causes the sandpaper to remove too much paint and gesso where your fingers pass over the stretchers. This will only be apparent in the finished painting in certain light and looks terrible. I misted the painting and wiped off the dust with a damp paper towel. The paint washes and scumbles I applied next went on really well.
I then began refining the background using the same colors used to under paint it. I worked in a couple of layers of paint by two or three more scumbles, using a combination of burnt umber, cerulean blue and white. I added a shadow at the top right side to break up the large, empty space.
I began working in the leaves with hooker’s green, sap green and acra red to darken the green in the shadows. The beets were painted with cadmium red, acra red and a little white. I used some winsor blue for the shadows. This was a good place to use a series of scumbles to define the shape and shadows on the beets and to paint in the curve of the beet with crisscross brush strokes. I started to work in some finer details on the surface of the beets at this point.
I painted the stems in the back first, then the stems on the left beet second. The stems were roughed-in with several layers of acra red, cadmium red and a little white. I used windsor blue to darken the shadows. Beet stems are “C” shaped in cross section and have shallow ridges on the outer side, somewhat like a stalk of celery. I used cadmium red and a little white to indicate the raised ridges and a wash of windsor blue and acra red to deepen the ridges between the highlighted ones. As I finished off each stem, I added a small amount of pure white to make the highlights at the bend in the stems. It’s easy to overdo this, so I added these sparingly as the group of stems increased. At the cut end of the stems, I placed a few dabs of winsor blue with a brush, then dabbed some of it off with a finger tip.
I worked through each beet in turn to keep the color and shading consistent. In the end, I was using more cadmium red and they were too light. I ran a wash of acra red over them all and got a deeper, rich red. To finish the body of the beet, I added some white and acra red for highlights. I then washed some areas with a little burnt umber and burnt sienna to indicate some dirt still clinging to the beet. The collar where the beet and stems meet was done with several dabs and strokes of burnt sienna, white, and yellow ocher. Not too finely detailed, but effective. I went back and added some deeper shadows in the crown and between the bases of the stems.
I started building the layers of green and red on the rest of the leaves next. The pieces of green leaf between the stems were put in using sap green, hooker’s green and white for the broad part of the leaf. I used the acra red to darken the green. The veins are acra red, cadmium red, with a few white highlights. The main vein goes up the center of the leaf and branches off on alternating sides as it goes along. The veins branch off and get finer and finer to the very edge of the green leaf. The extreme edge of the green leaf has a thin line of acra red along the very edge.
I began the marble shelf with several washes of burnt sienna, white, yellow ocher and a touch of cerulean blue. I usually use a turkey feather (or parakeet tail feathers when I had them) to put veins in marble. Having neither, I did this step with the same #8 brush, the two ounce spray bottle of water, and a cloth to dab up any runs. I painted the marble quickly and very loose on the top and used more care near the front edge. I played around with the root running over the edge of the table, adding shadows on the marble and the little, fine hairs coming off the root. Below the front edge of the shelf I used windsor blue, burnt umber and acra red to have a deep, dark space.
September Beets, step 4: The Final Stretch.

I put the painting aside and let it simmer for several days. I find it helpful to work on another painting (or two) to as I near the end of the current work. Making decisions and solving problems on another painting refreshes my critical eye as I work with other ideas and colors for a while. When I went back to the current painting (the beets) it was with a fresh eye and attitude towards the work. During this time, I do keep the beets in a prominent space in my studio or on a chair at the dining room table, or next to the television during the evening as I plotted the last of passage of the painting. I decided that the background was too light, I needed stems on the right to balance the greens on the left, and I wanted a stronger shadow on the right background. I needed to warm up the shelf at the front edge, and place fine white highlights at the edge of the table. The collar of the beets needed more suggestions of texture and depth.
September Beets, Step 5: The Finish Line.
I toned down and unified the background with scumbles of the same blue, brown and white again. I wanted this part to transition from dark to a strong light source. I finished all of the green leaves and refined the collar detail and highlights of the stems. I added the fine hairs at the root of the front beet and added a few hairs around the collar. I added a touch of white to highlight the lighter side of the beets by tapping little dots of white with a tip of the brush, then quickly tapping the spot with a finger tip. I gave the surface of the beet a wet look, like it was just pulled from the ground and hosed off. I added a couple of small, dark clumps of dirt at the base of the root and on the table top. I darkened the shadow of the root, and placed some white at the edge of the marble shelf. I signed and dated it, applied three coats of thinned acrylic medium, and it was done!
This was a fun painting to produce and draws good comments when shown. I hope you enjoyed this on-line demonstration. Your comments are always welcome; and keep checking the site for more demonstrations and hints on how I use this great medium.
Sincerely, Don


Thank you so much for the details in your methods of painting. I don’t have a personal instructor so this is as close as it gets. Thanks for sharing your knowledge of painting to us ‘wanna be artists’. It’s really appreciated.